Generate SSL Certificate#
For access to the digital clock via secured web pages - https it is necessary to burn SSL certificate directly to the digital clock. Clocks are provided with a factory certificate which is generated during the manufacturer process.
See also
More info about accessing the Web Interface from web browser via HTTP and HTTPS protocols can be found here .
Certificates are provided in the manufacturer process since SW version v7.12. In the case of updating SW version in the digital clock from earlier versions, there will be an active alarm Invalid SSL certificate. So it is necessary to upload an SSL certificate by your own.
Certificates required:
RSA 2048 bit
Fingerprint using SHA-256
Generate Certificate#
You can use any method to generate certificates.
If you are unfamiliar with the process of certificate generation, you may utilize this website.
Visit CertificateTools.com.

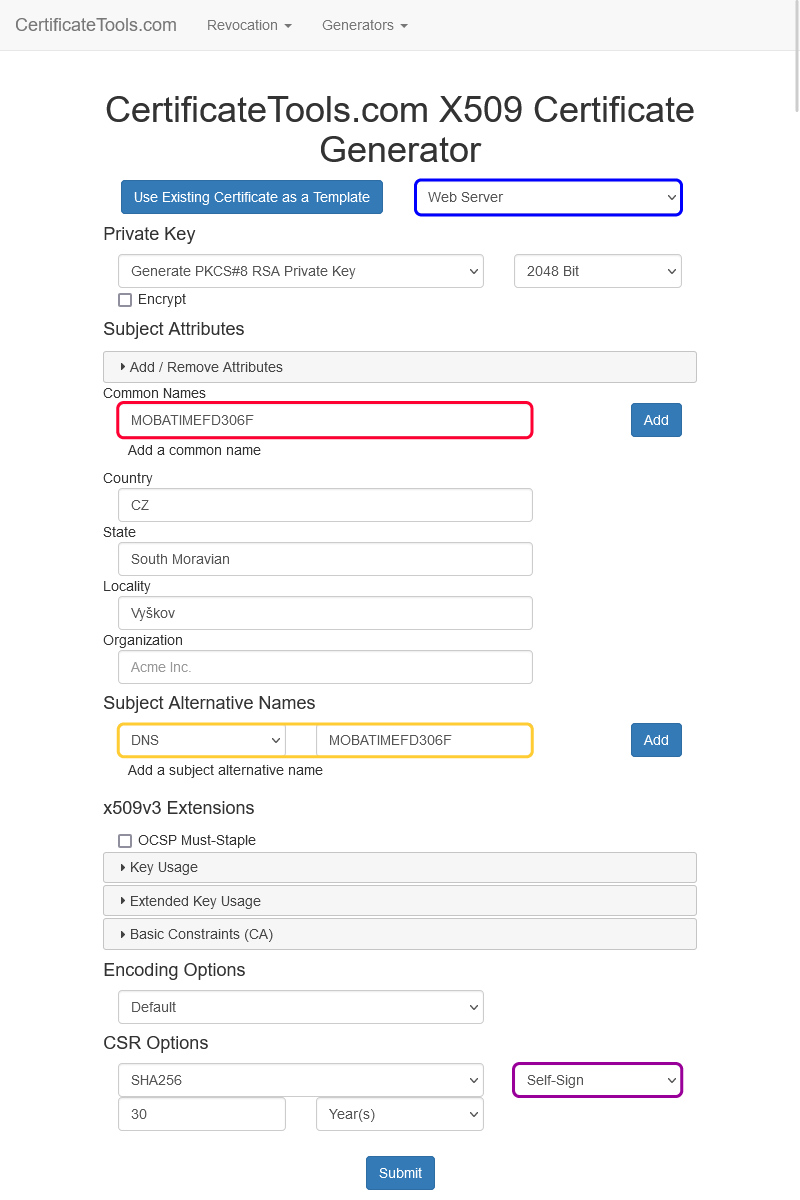
On the top right list please select option Web Server (marked by blue).
To the columns Common Names (marked by red), please type requested name of the subject and click Add.
For example
MOBATIMEFD306Fis used for the MAC address00:16:91:fd:30:6fin the manufacturer process.
To the column Subject Alternative Names DNS (marked by yellow), please type requested name of the subject and then click Add.
The requested name of the subject can be:
MOBATIMEFD306F(as stated above)MOBATIMEFD306F.localIP address
In the CSR Options please set CSR Only to the Self-Sign (marked by purple) and type requested validity of certificate, e.g. 30 years.
Optionally, you can also set other fields.
Then click Submit.
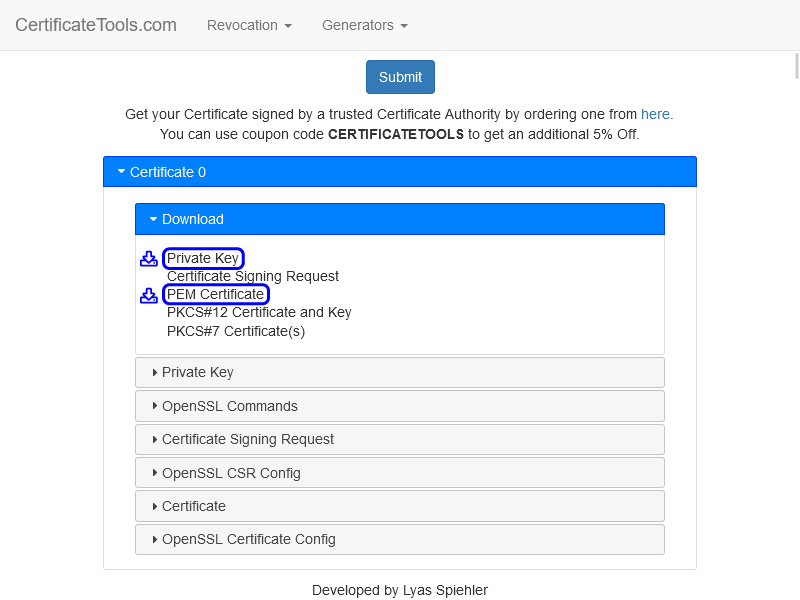
The web page will generate a certificate.
Download files Private Key and PEM Certificate.

Hint
You can also use these instructions if you want to generate different SSL certificates.
Uploading a Certificate#
Rename file
cert.key(Private Key) tokey.pem.Rename file
cert.crt(PEM Certificate) tocert.pem.Copy these files to the folder for your TFTP server.
On the web page of digital clock navigate to section Supervision Services.
Set the field HTTPS server certificate upload to Private Key and press Apply.
It should display
Configuration savedand the Private Key should be uploaded.Set the field HTTPS server certificate upload to the Certificate and press Apply.
It should display
Configuration savedand the Certificate should be uploaded.
Certificate Application and Managing#
Apply a New Certificate#
Set the field HTTPS server certificate manage to the Apply user certificates and press Apply.
It should display
Configuration savedand a new certificate should be uploaded.
Delete User Certificate#
Set the field HTTPS server certificate manage to the Apply factory certificates (delete user certificates) and press Apply.
It should display
Configuration savedand user certificates should be deleted.