Setting Parameters via the Terminal Menu#
The user menu is accessed via the 3 line icon in the top bar of the terminal screen.
What Does the Menu Contain?
Under the user menu, you will find following options:
Presence
Approvals
Employee Management
Settings
Close
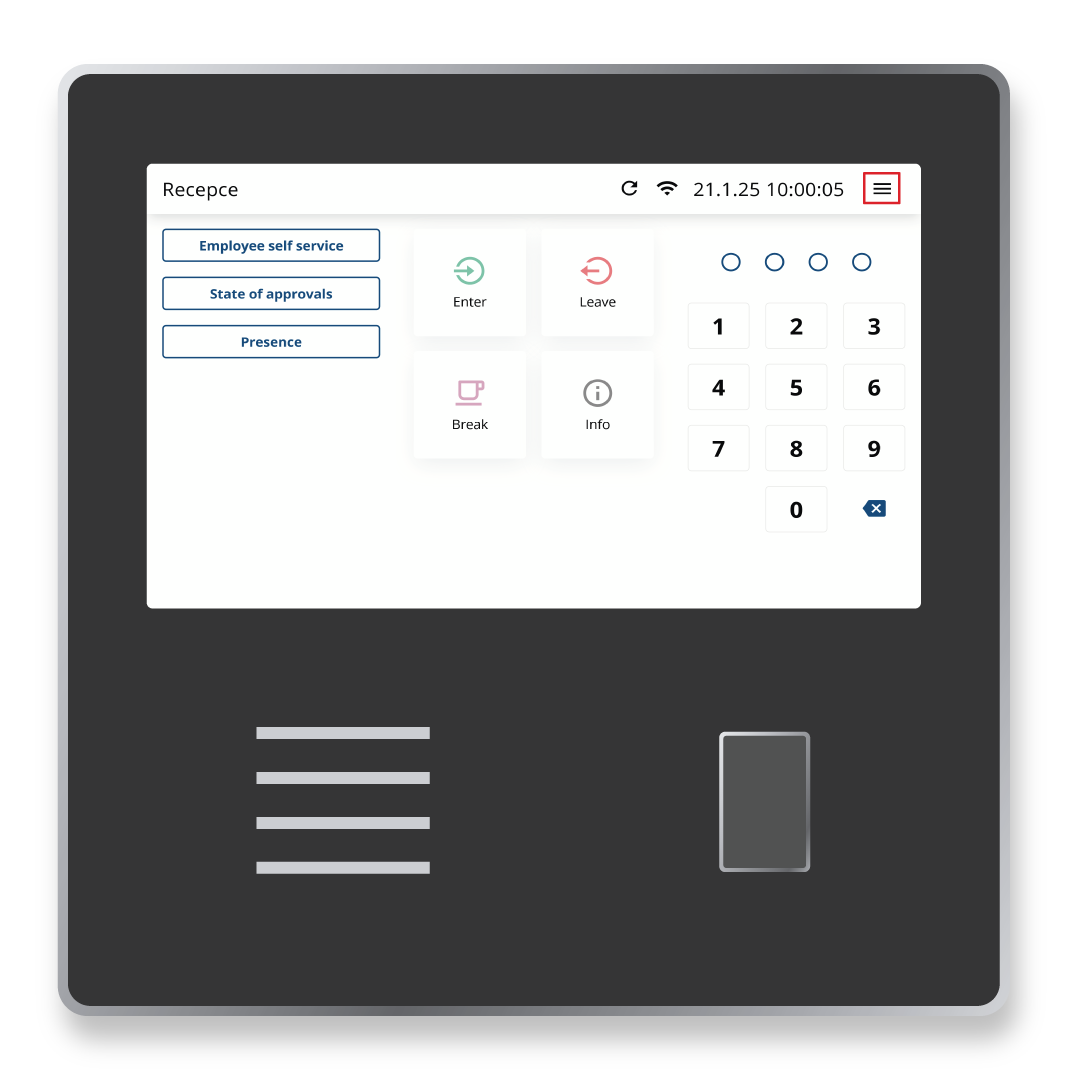
Presence#
Under the given option you can see the presence of employees. After selecting presence, identification is required.
After attaching the RFID medium / Fingerprint / PIN code, you will see the attendance of the employees you have set to display their attendance preview. In the list you can view all present or absent employees.
Approvals#
This agenda provides an overview of your leave requests and planned absences. The recorded leave or absence is forwarded in the system to the appropriate supervisor for approval.
When a request is approved or denied, the status of the request is identified by a color code:
1
Pending request
When a request is approved or denied, the status of the request is identified by a color code:
1
Approved request
1
Denied request
Employee Management#
Under this agenda you have the option to add / remove / change employee identification methods for recording attendance, namely:
- RFID (chip / card No.):
Registration of RFID media can be done via the web interface of the system or via terminal. To find out the RFID number, attach the medium to the reader / scanner.
- PIN:
4-digit number.
- QR Code:
Identification for mobile app.
- Fingerprint:
Up to 10 fingerprints [1].
Before you can enter the agenda, you must be logged in as a company admin. After selection the Employe Management agenda, the terminal promts for identification.
Clicking on the employee’s name will open a menu of possible indentification methods and what actions you want to take.
How to Assign a Chip to an Employee via the Terminal#
Select
Changeoption in RFID identification menu.Attach the RFID media to the terminal reader (4 horizontal lines on the left side of the terminal).
The system will notify you that the RFID code has been successfully scanned. Confirm the assignment of the media to the employee.
How to Set Up an Employee PIN via the Terminal#
Select
Changeoption in PIN identification menu.Enter the 4-digit PIN code.
The system will notify you that the PIN code has been successfully assigned to the employee. Confirm the assignment of the media to the employee.
How to Upload a Fingerprint#
Note
Only for terminal with a fingerprint scanner (FPC).
Select the fingerprint learning button – the pingerprint learning wizard appears.
Employee applies the same finger repeatedly, the wizard informs about the process and successful input.
Finger must be covering the reader when applying, without much pressure.
Fingerprint can be deleted via the Employee Management agenda. Simply select the name of the employee, select name of the employee, select the settings for the fingerprint and select the fingerprint to be removed later.