

Ceiling Suspension Mounting#
Step 1
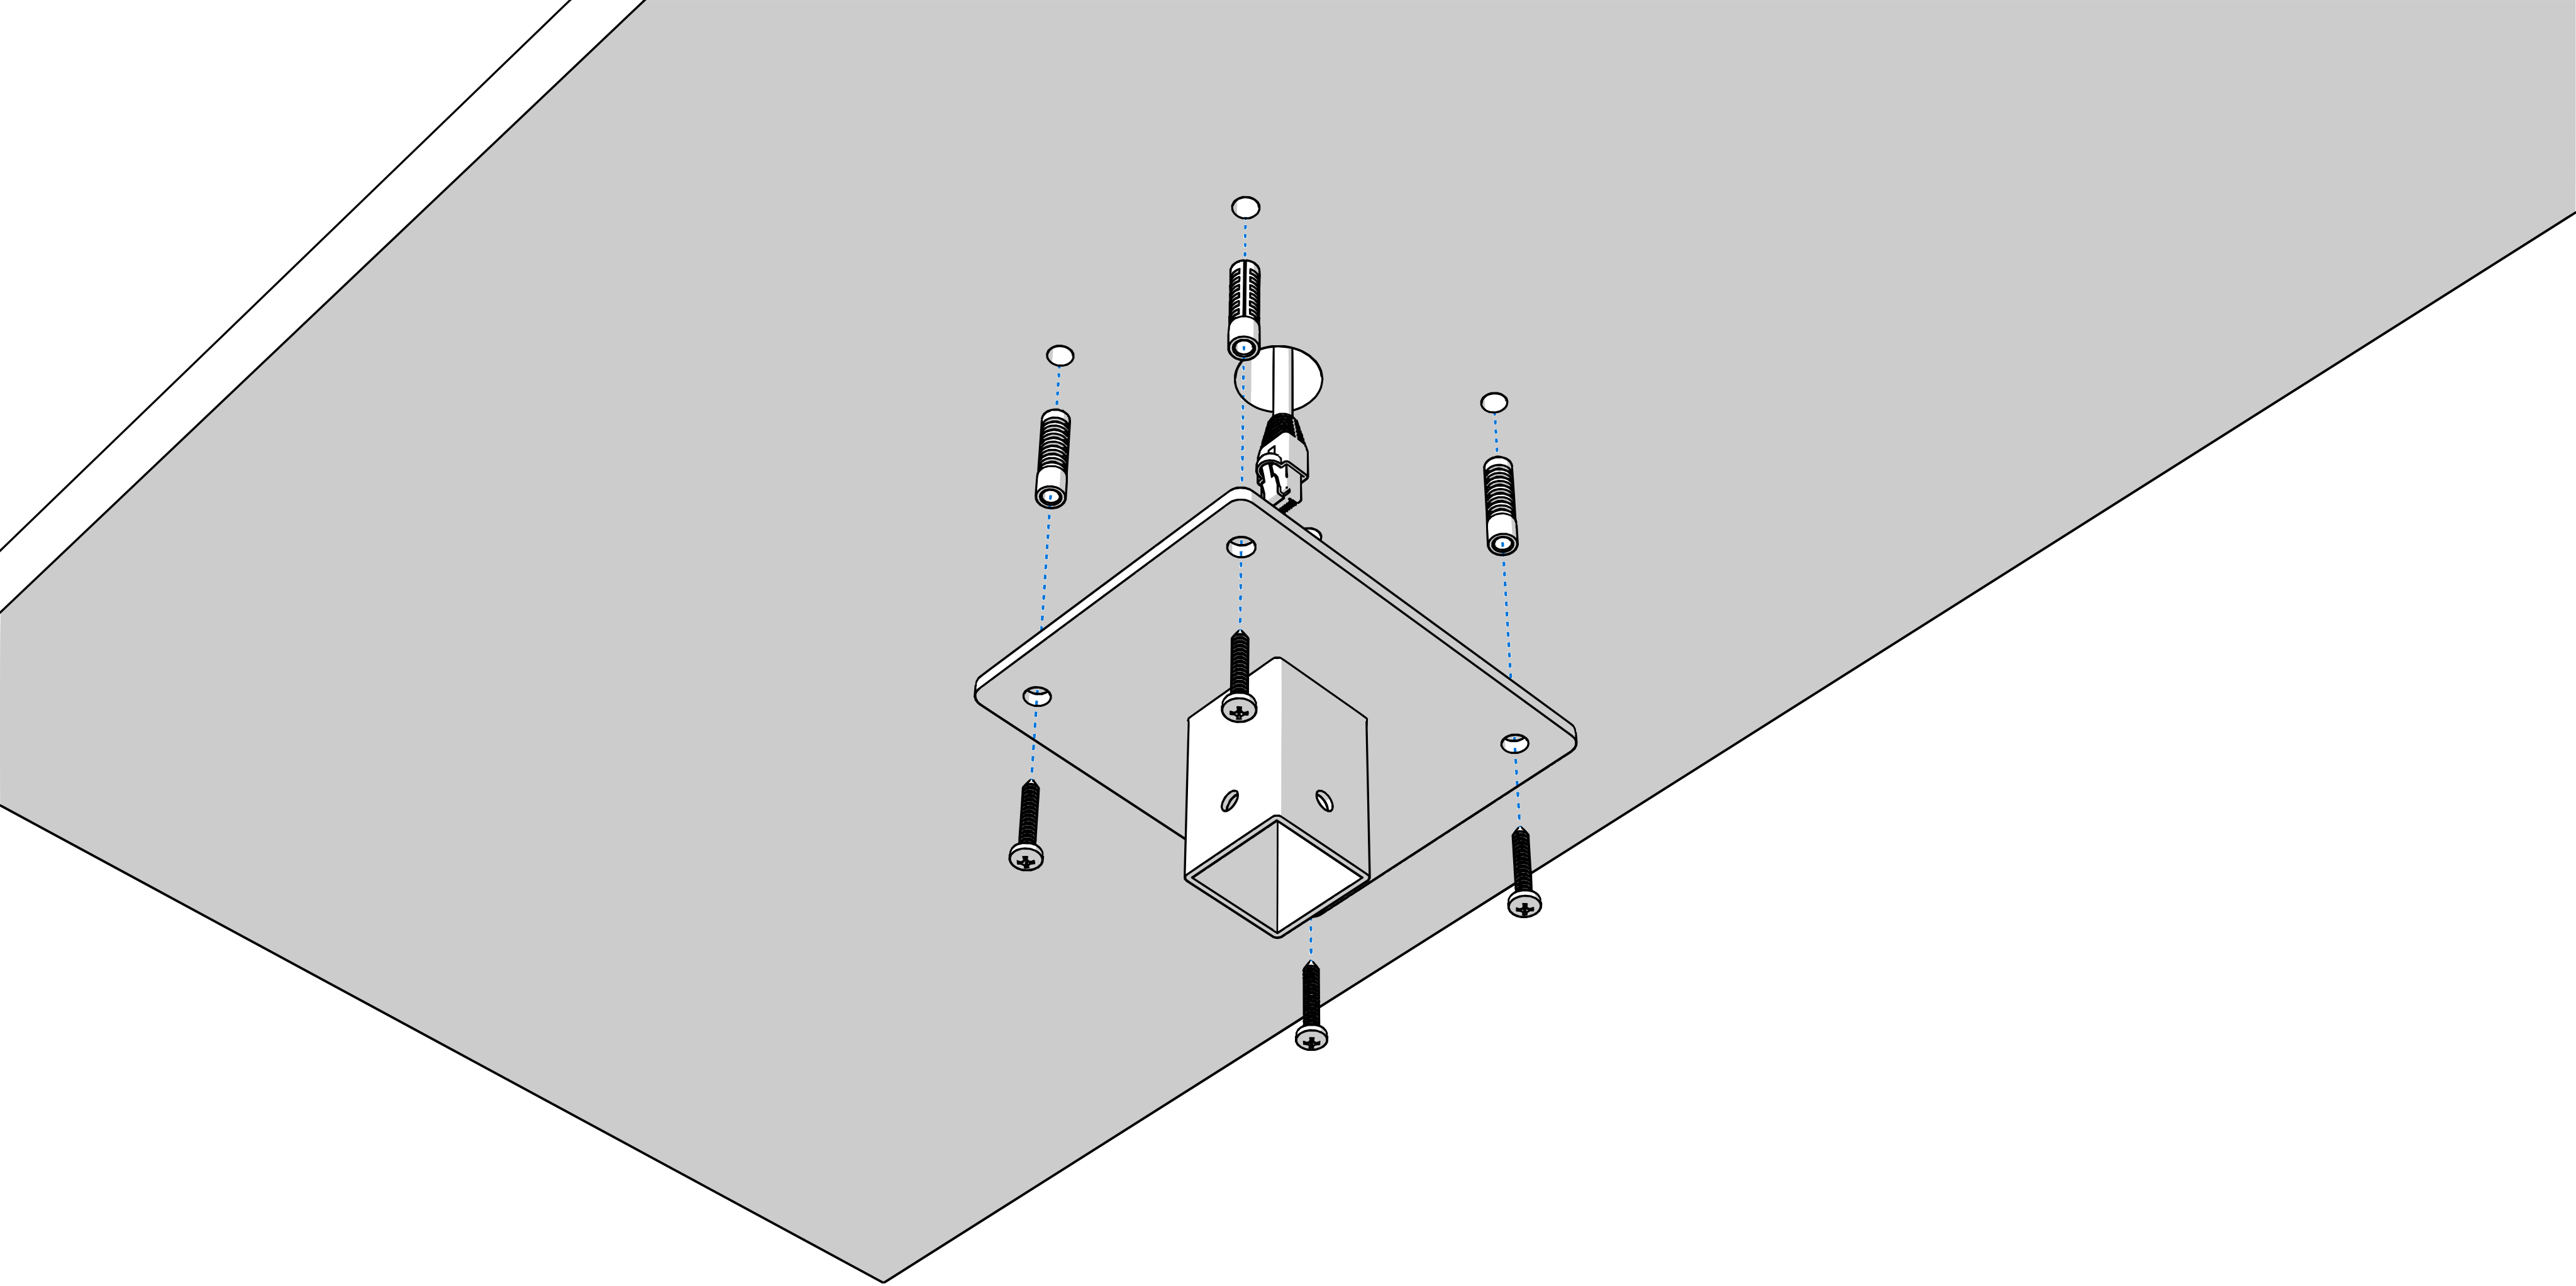
Drill four anchoring holes into a ceiling of a diameter adequate to accommodate supplied wood-type screws with dowels.
Interlace incoming cables through suspension pipe. Fasten the ceiling suspension to ceiling using 4 wood-type screws of 5 mm diameter.
Caution
Hole for incoming cables diameter min. 30 mm.
Step 2
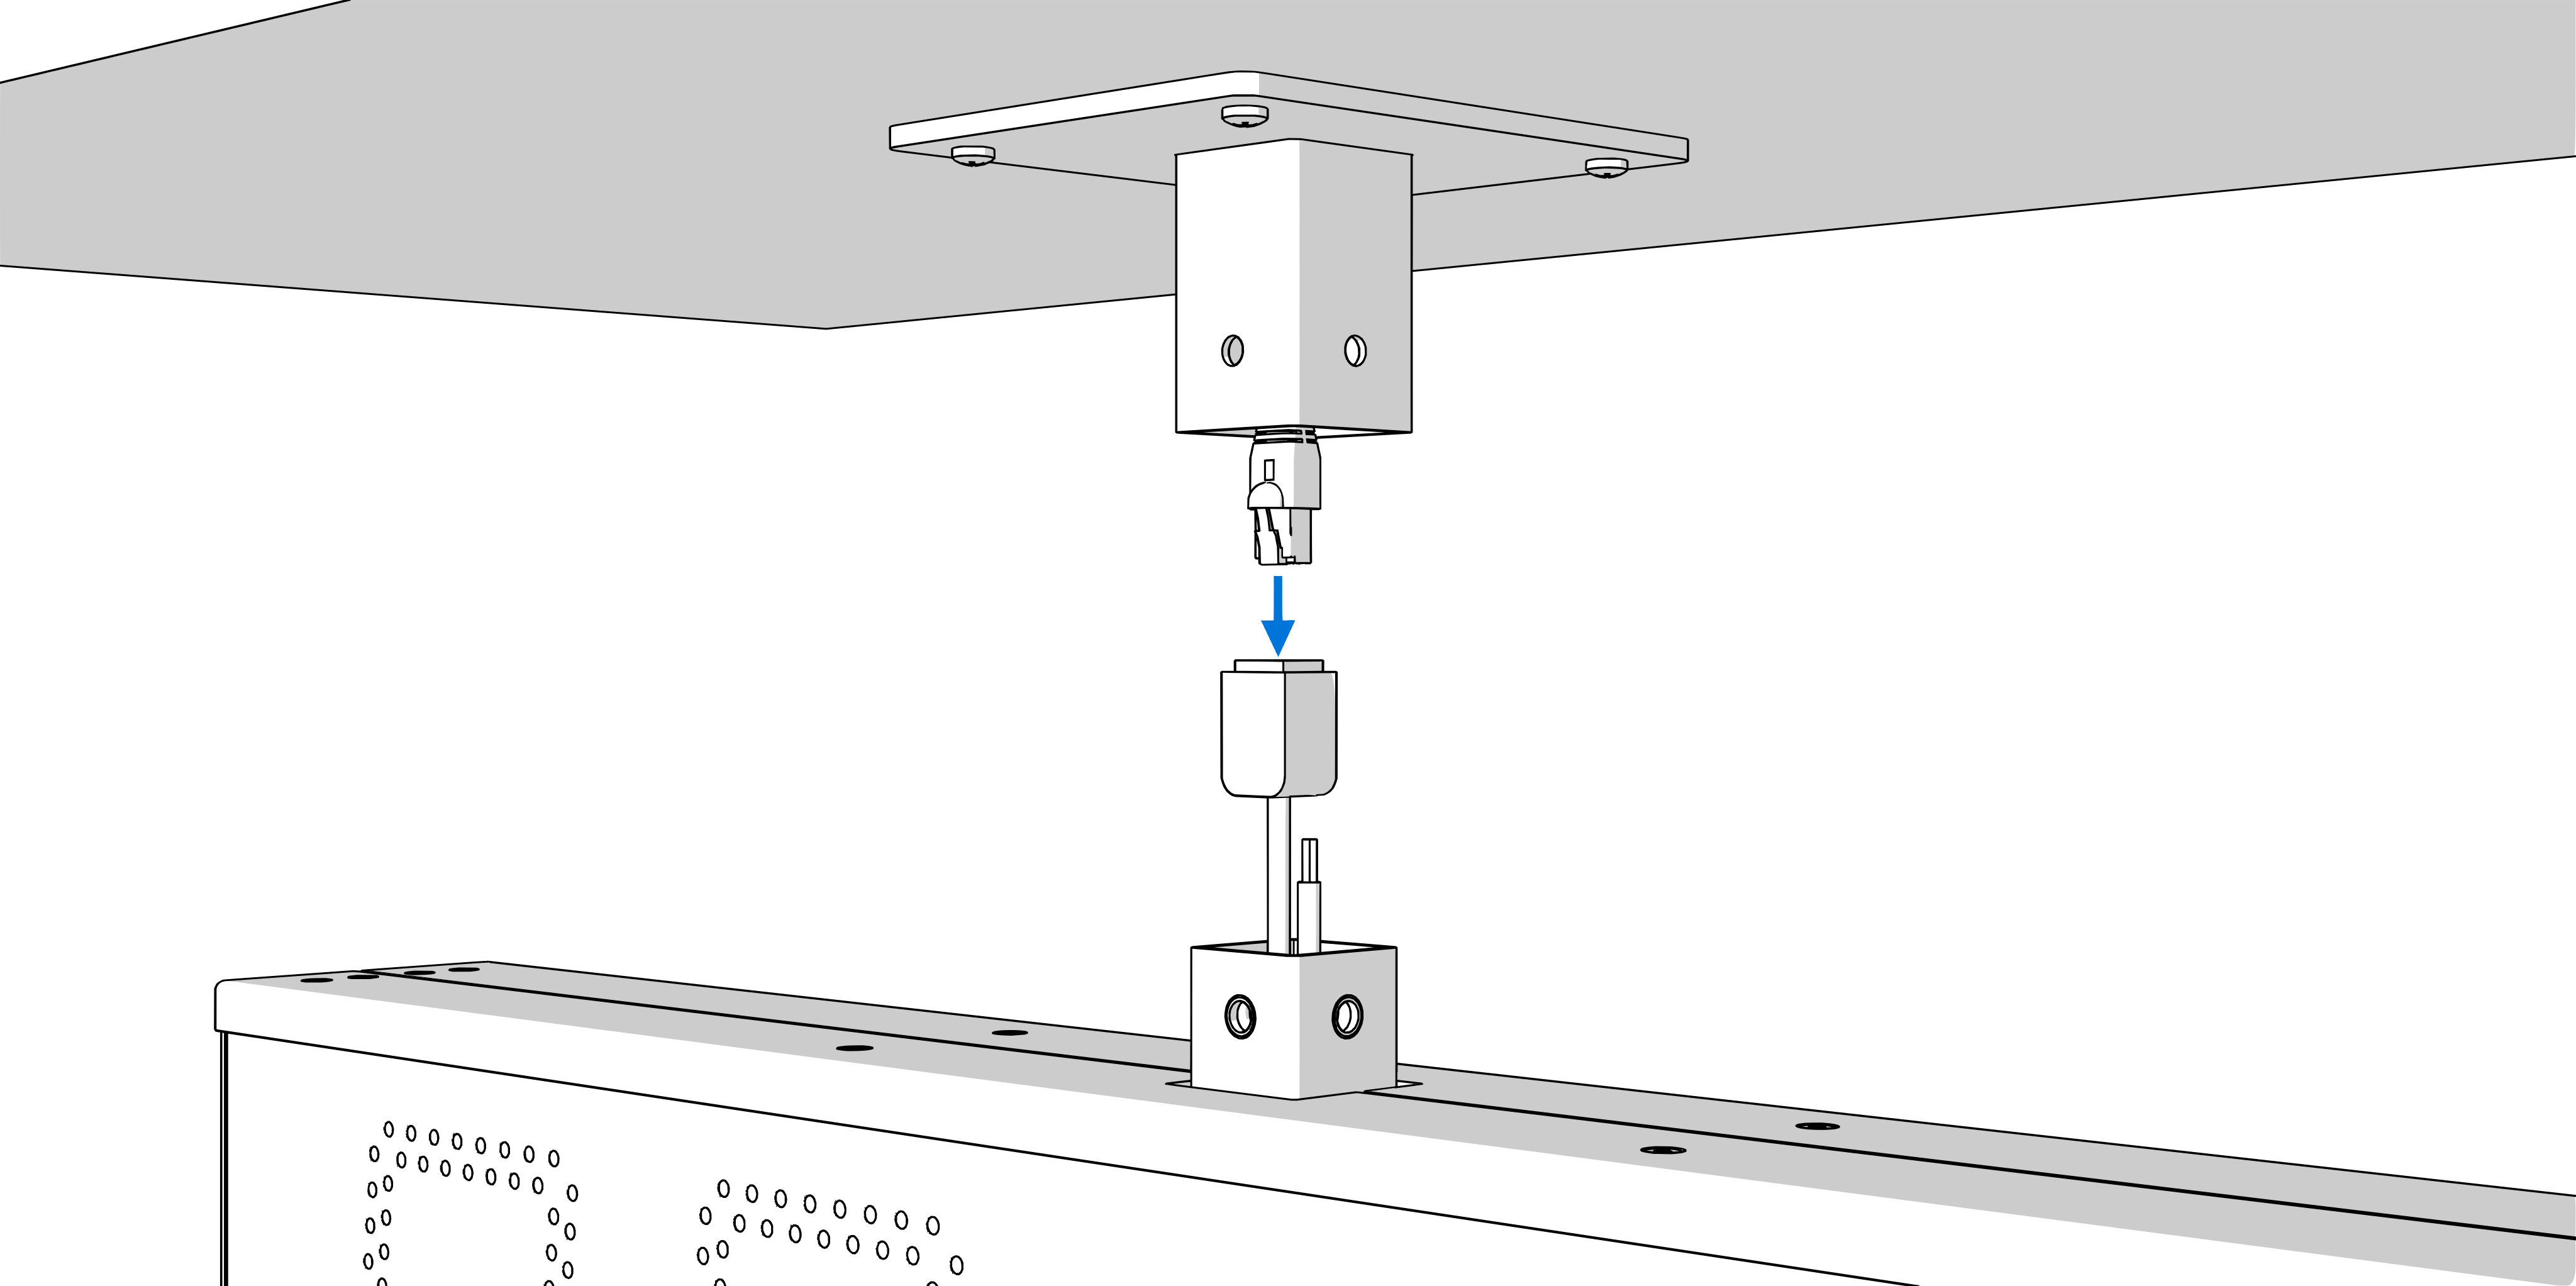
Connect all incoming cables to the pigtail lead from the clock.
Step 3
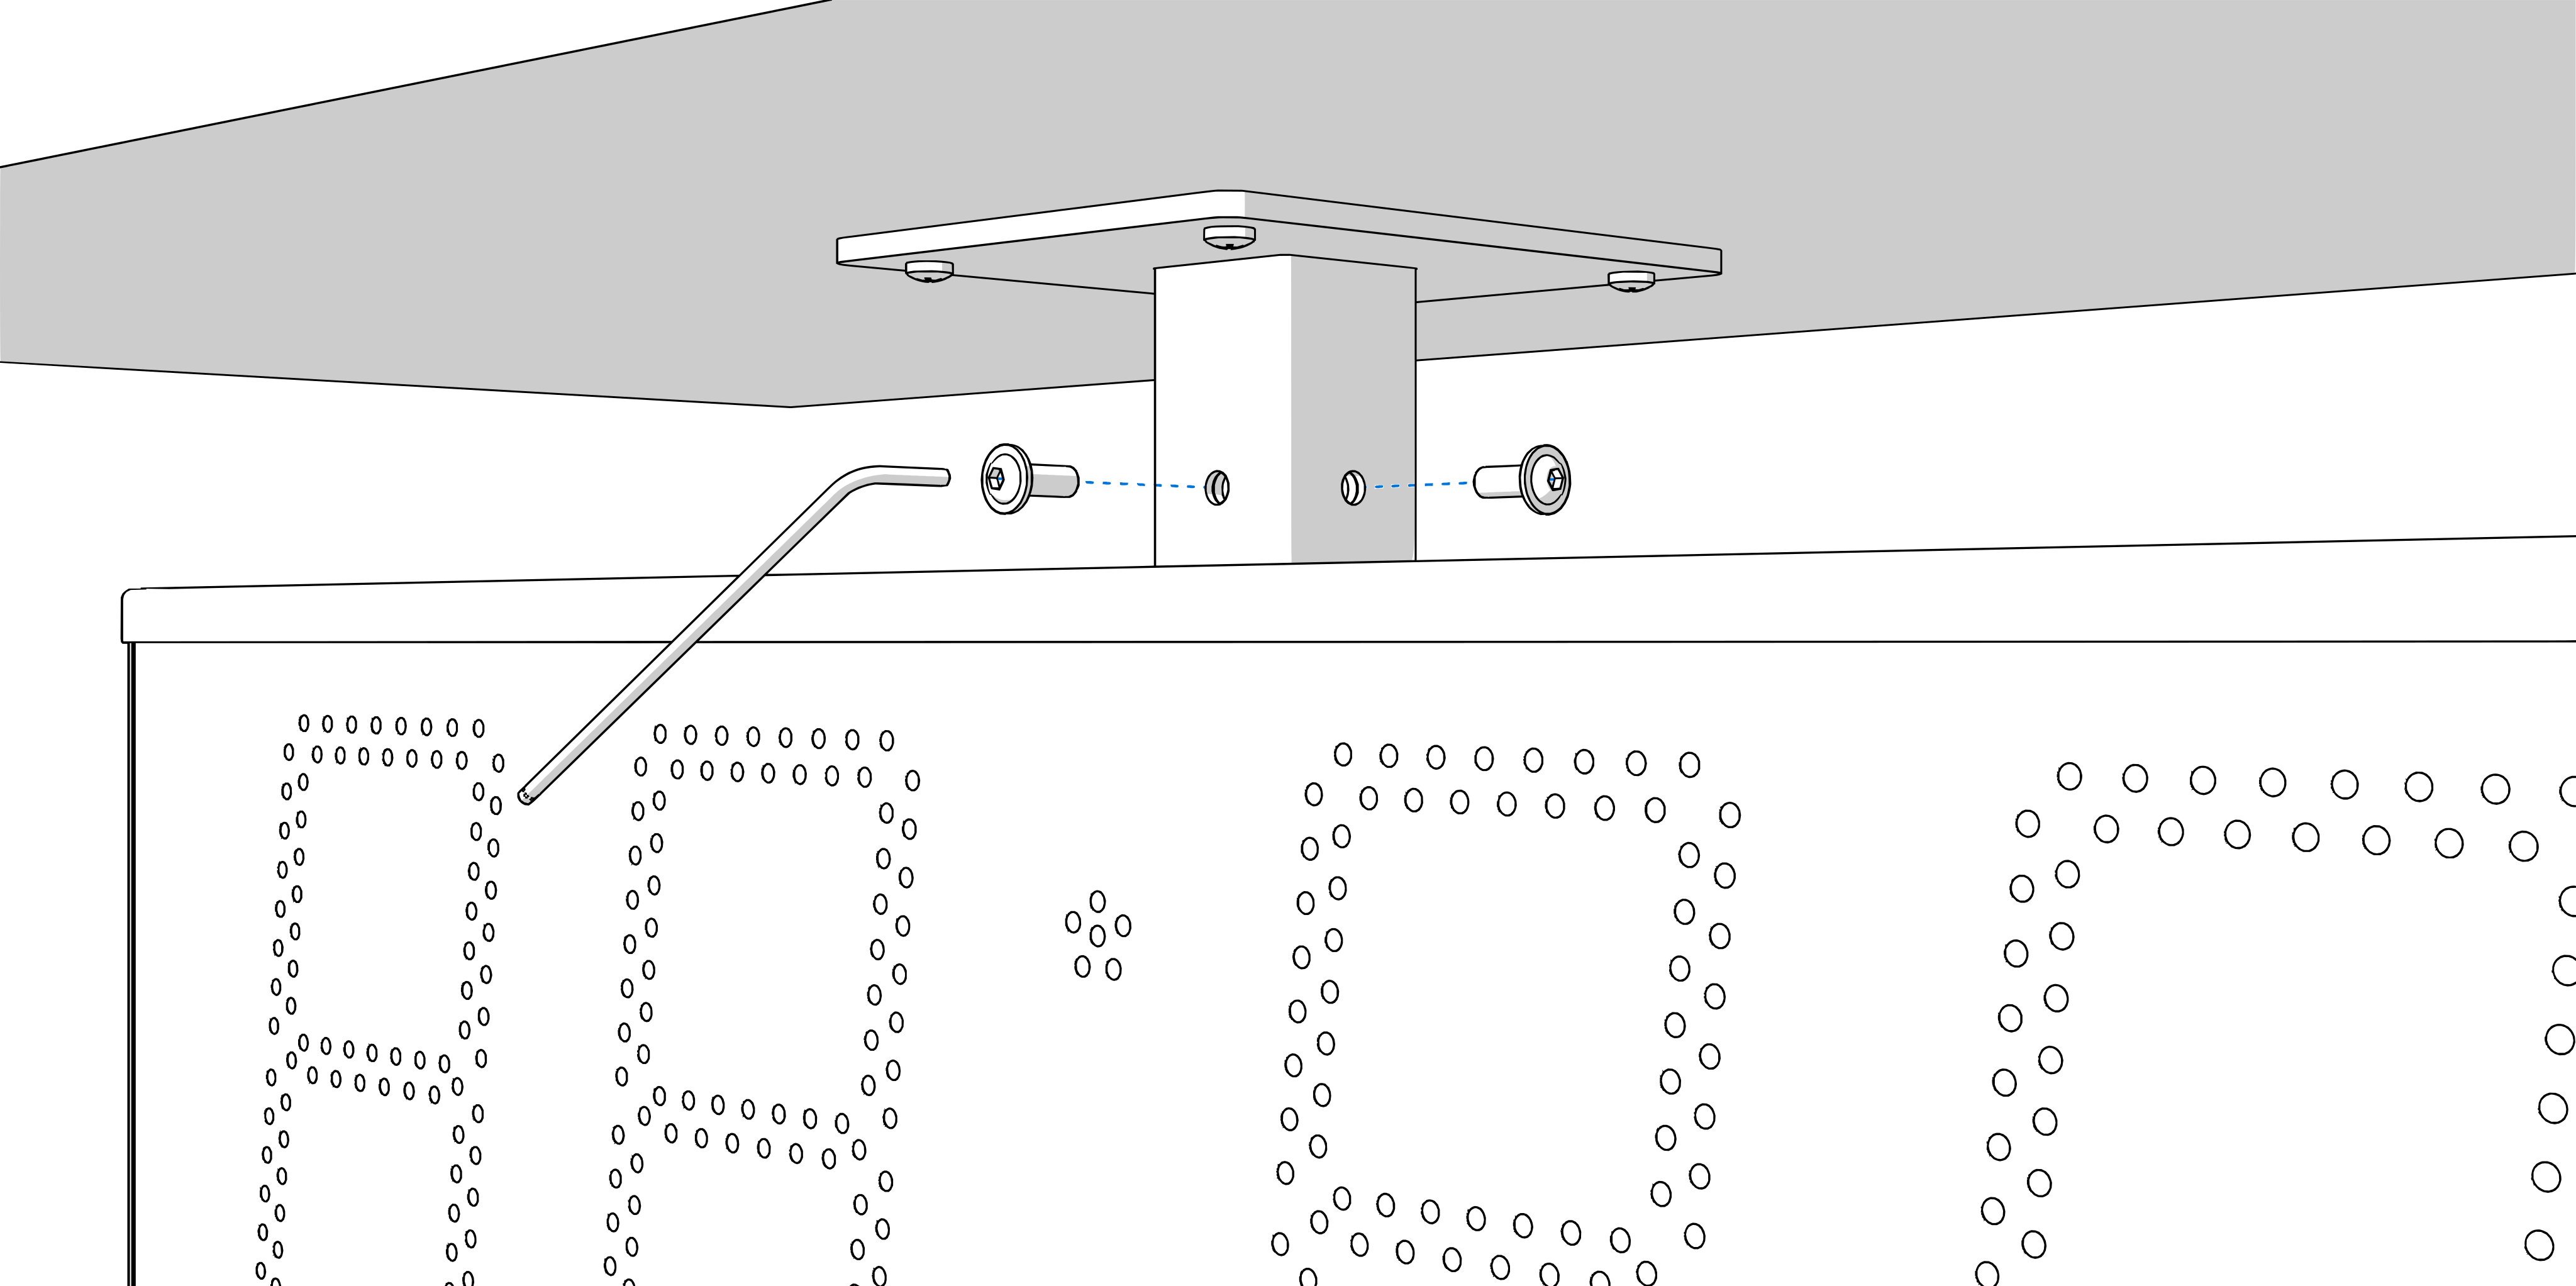
Slip-on the clock onto suspension.
Fix the connection by tightening the screws using Allen key.
Removing Glass#
If you need to connect other components (additional keyboards, temperature sensors, etc.) or configure the DIP switch, you need to remove the bottom cover and glass.
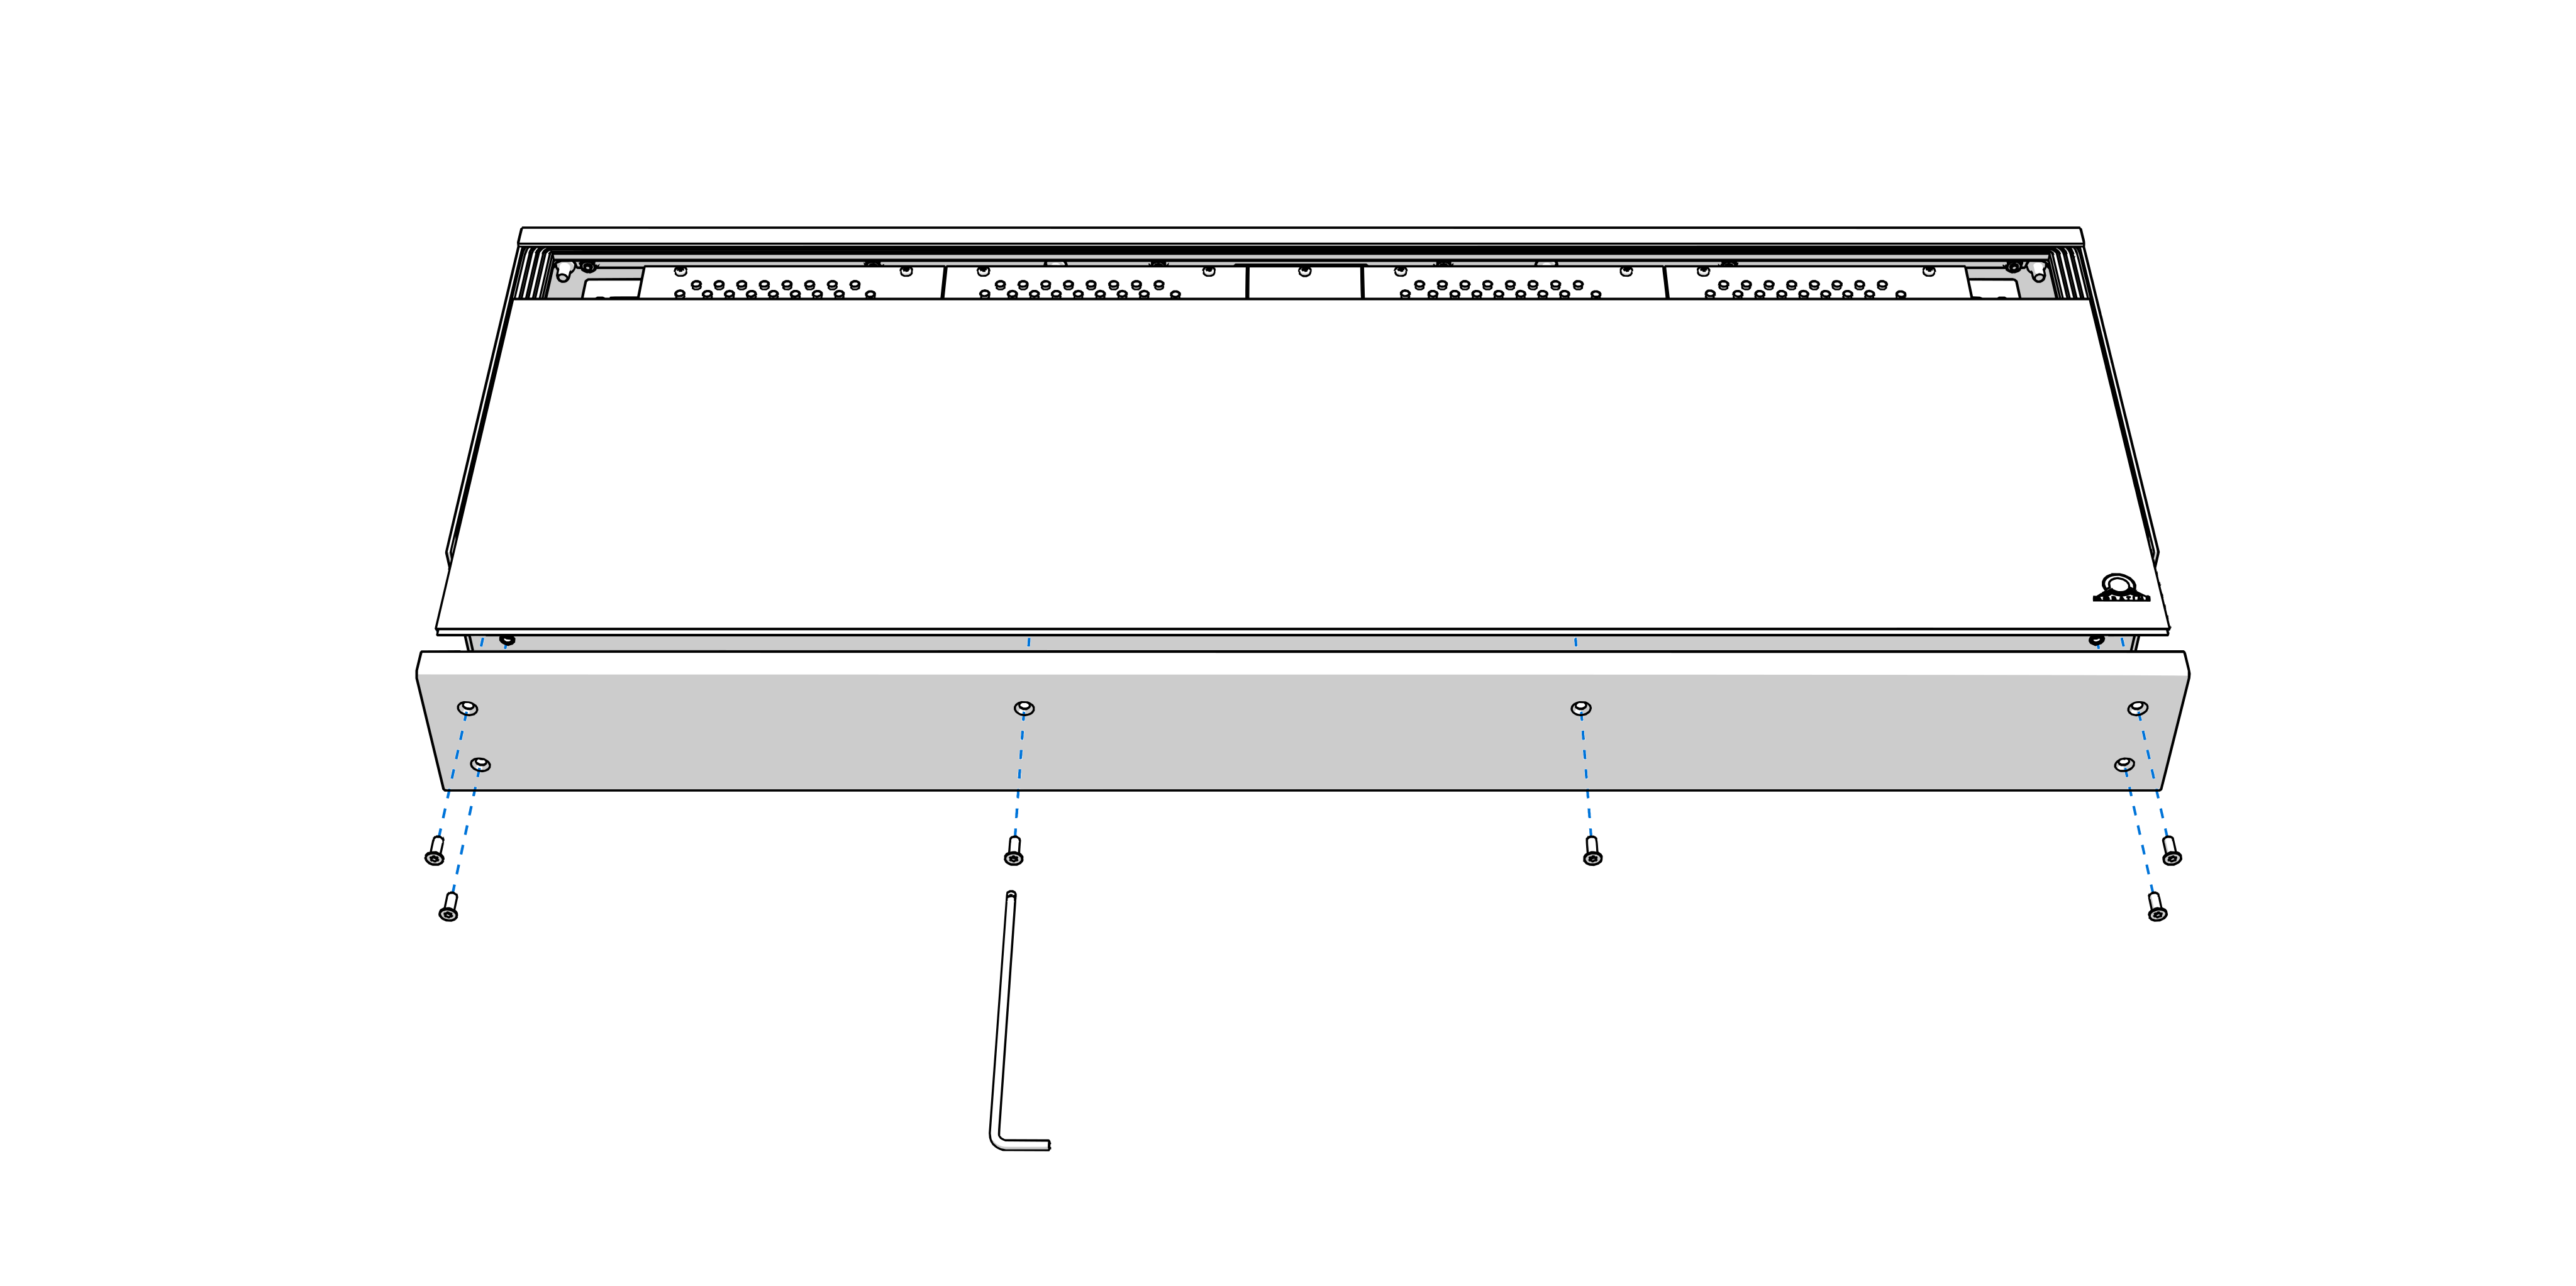
Remove the screws on the bottom side of the clock. Remove bottom cover and glass.
Interlace incoming cables through suspension pipe.
Connect the wires of the respective components to the terminal block on control board according to the label.
1
See chapter Cable Connection.
After connecting components or configuring the DIP switch, use reverse procedure and mount back the glass and bottom cover.