Approving#
Configuration#
For the Approving module to work correctly, you must first create an account for the employee in the iTA attendance system.
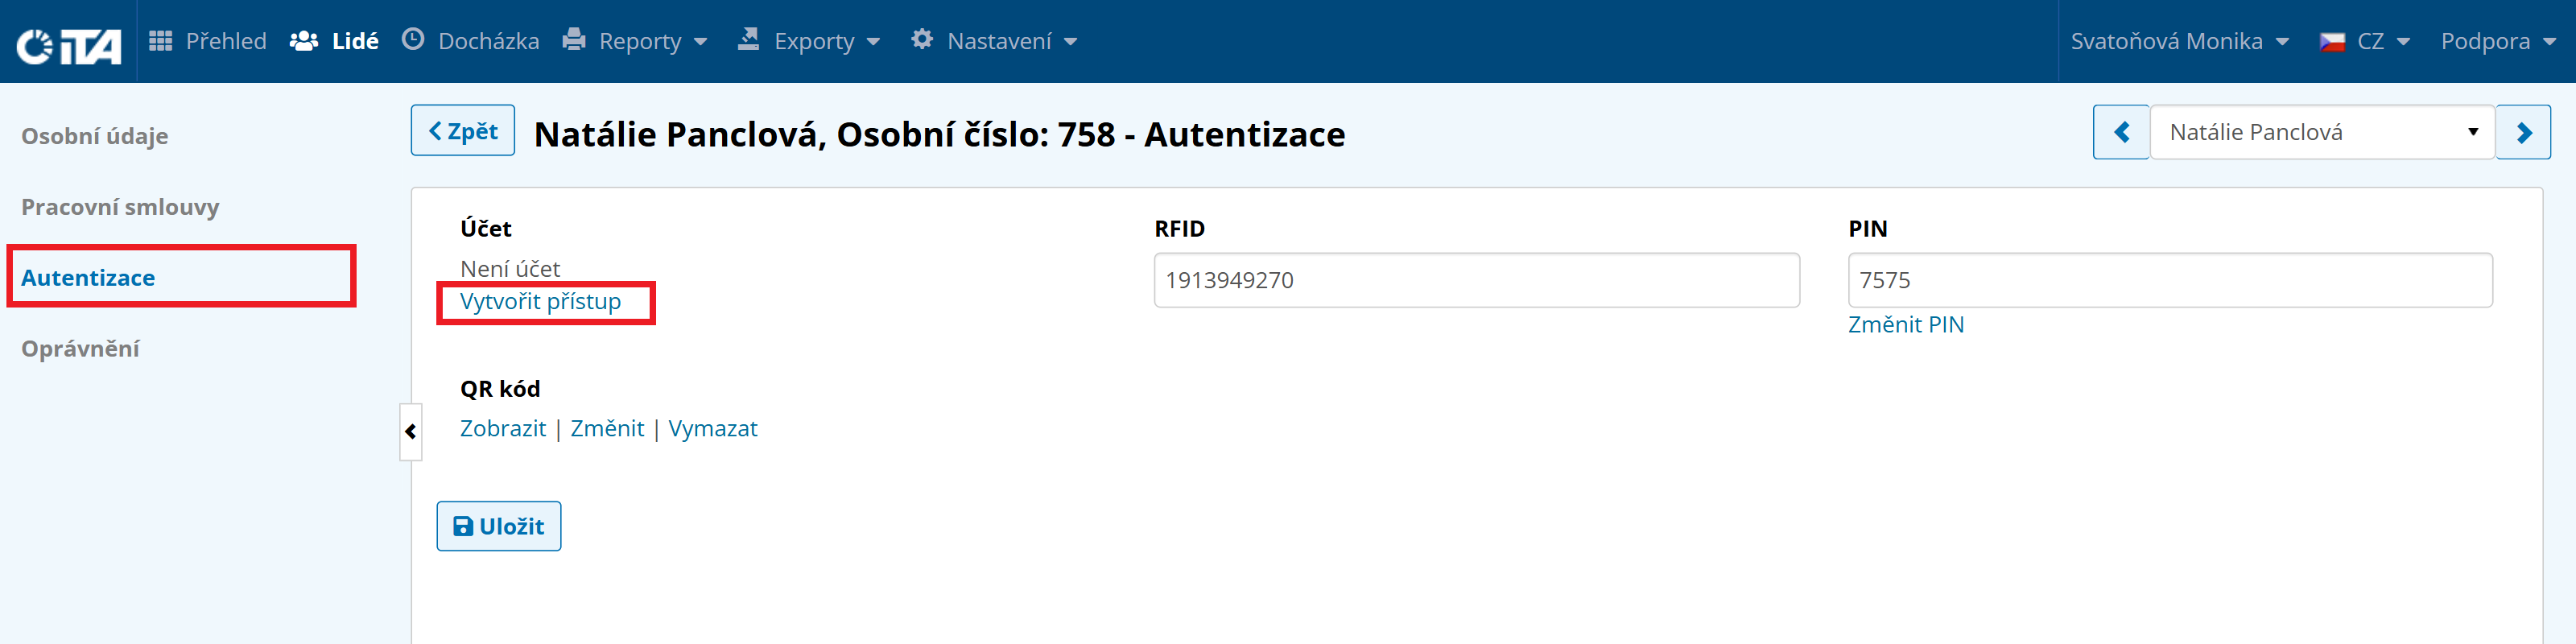
To create an account for an employee, go to People → Employees → click the relevant employee → Authentication. Then click Create Access and enter the employee’s email address, which will receive their username and password.
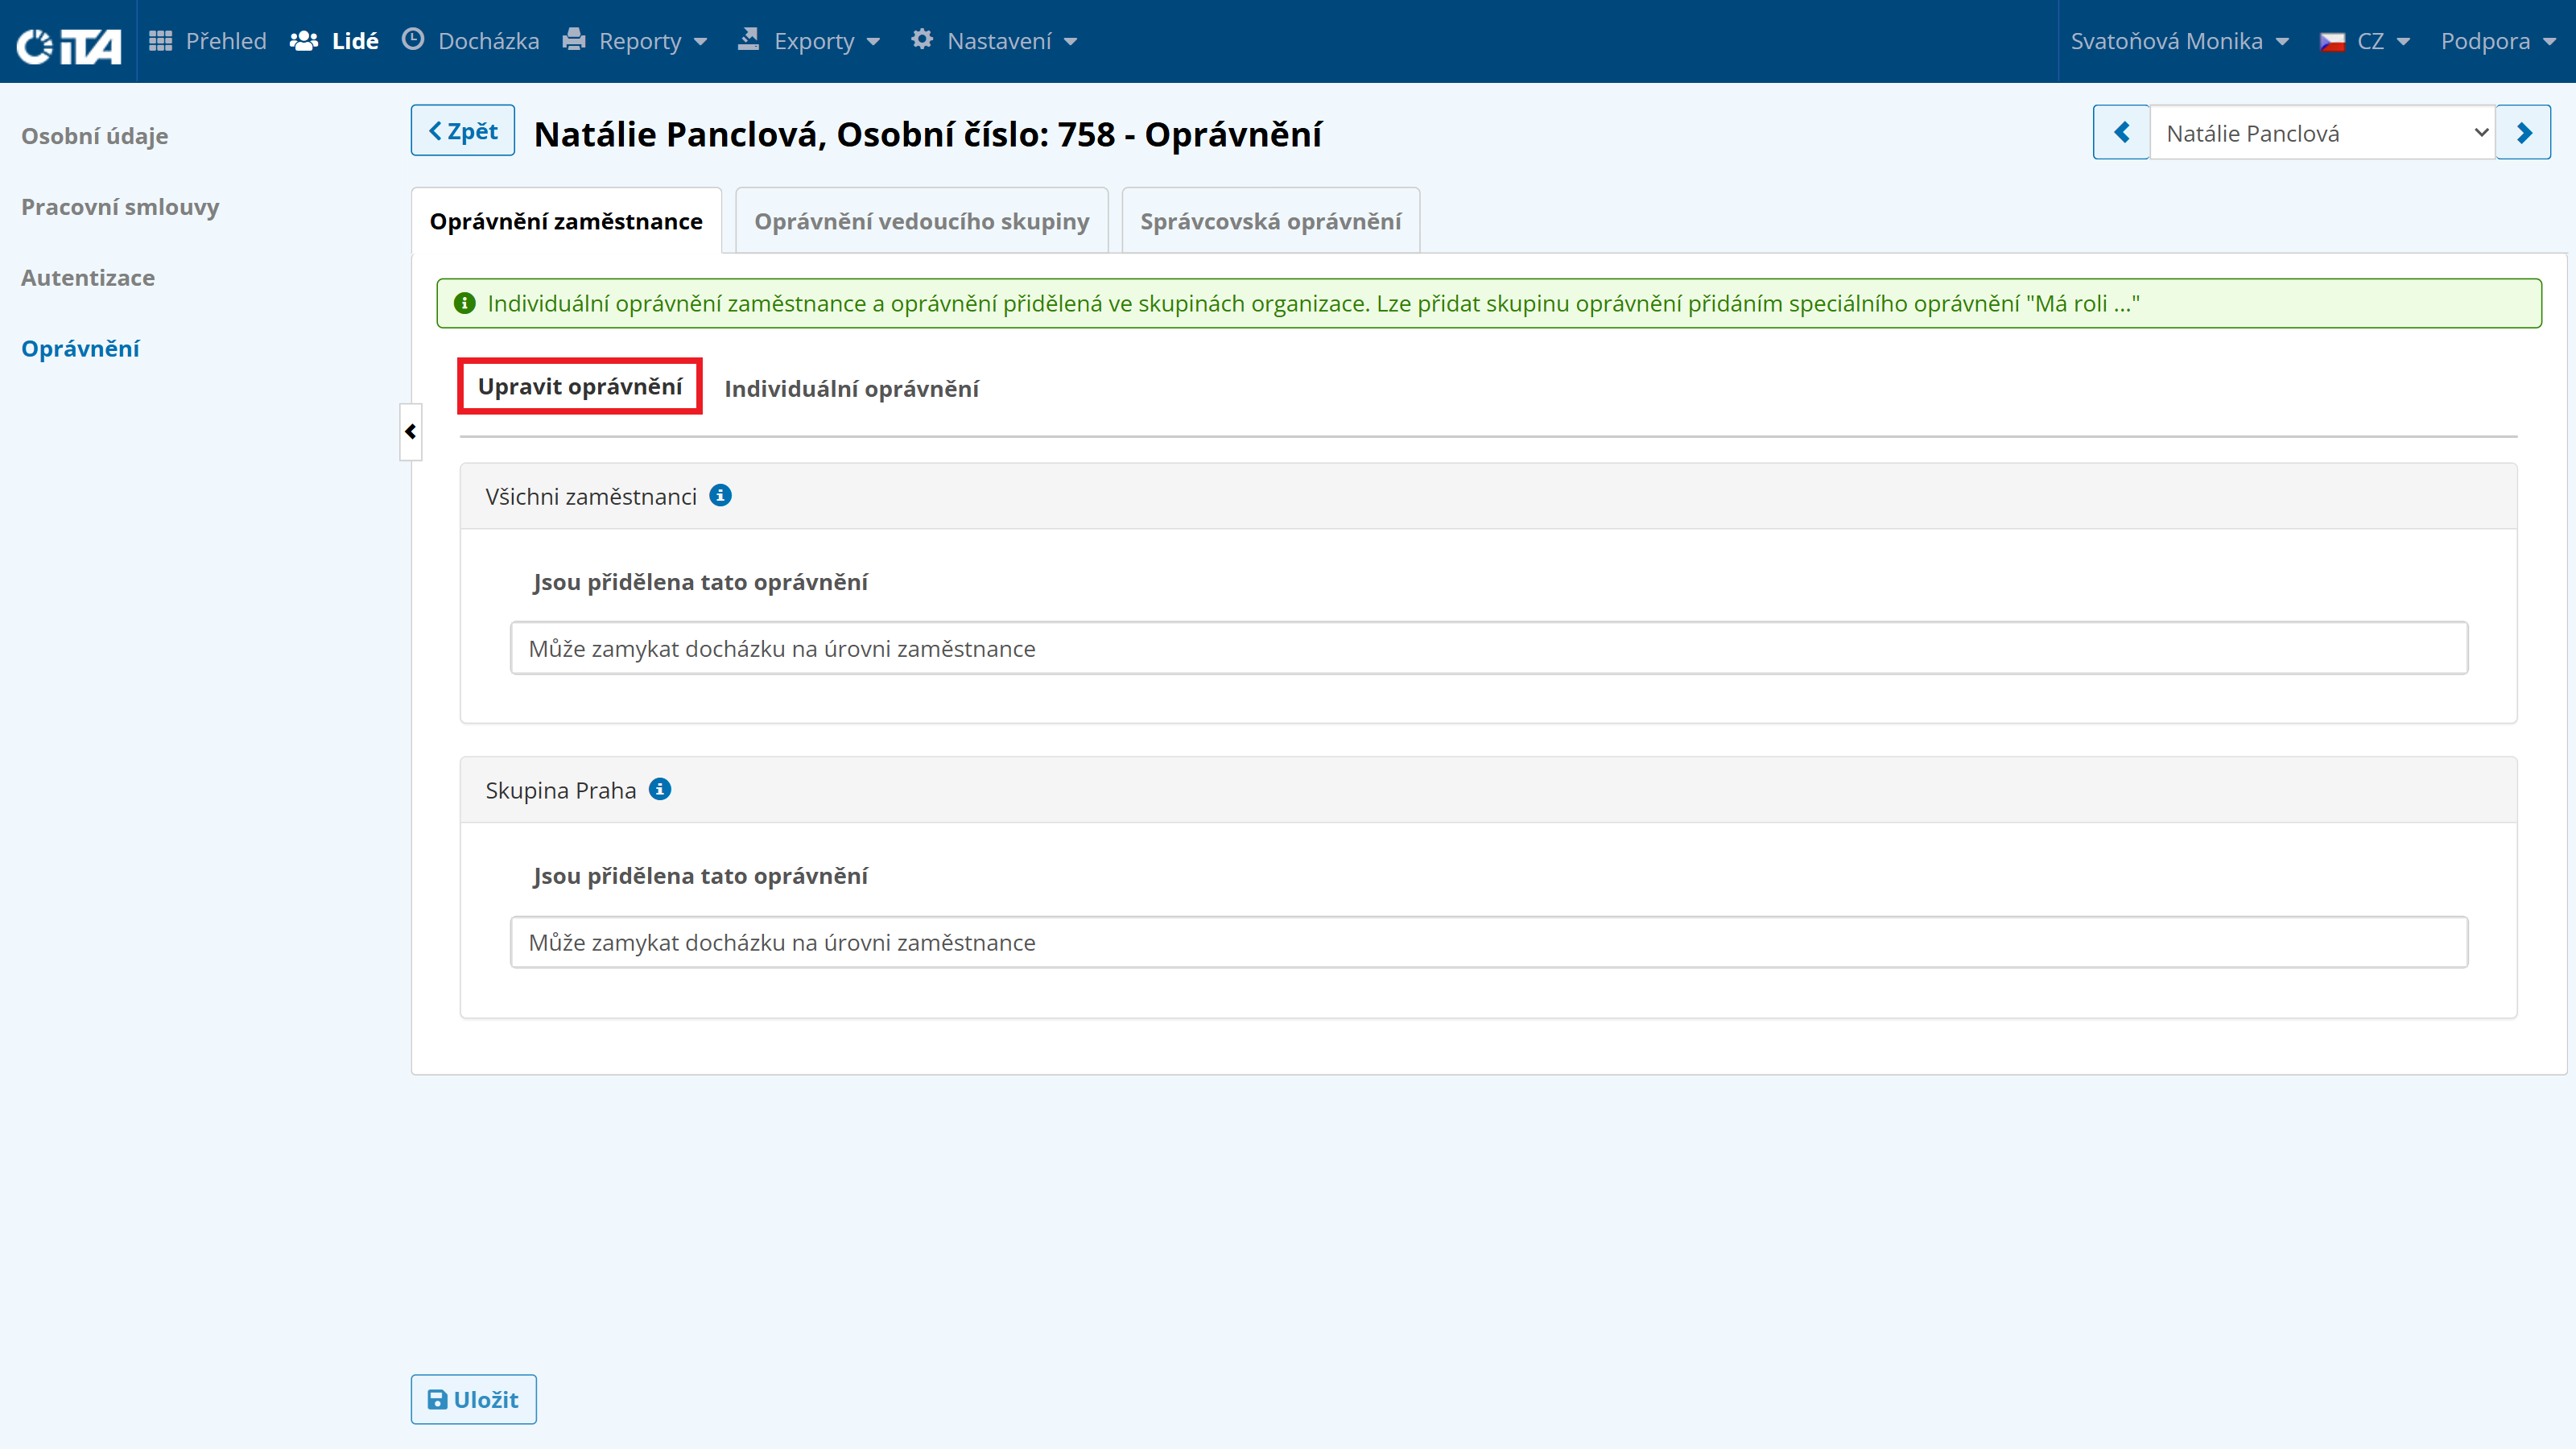
Then, on the Authorization tab, set the permissions you want to grant the employee and save.
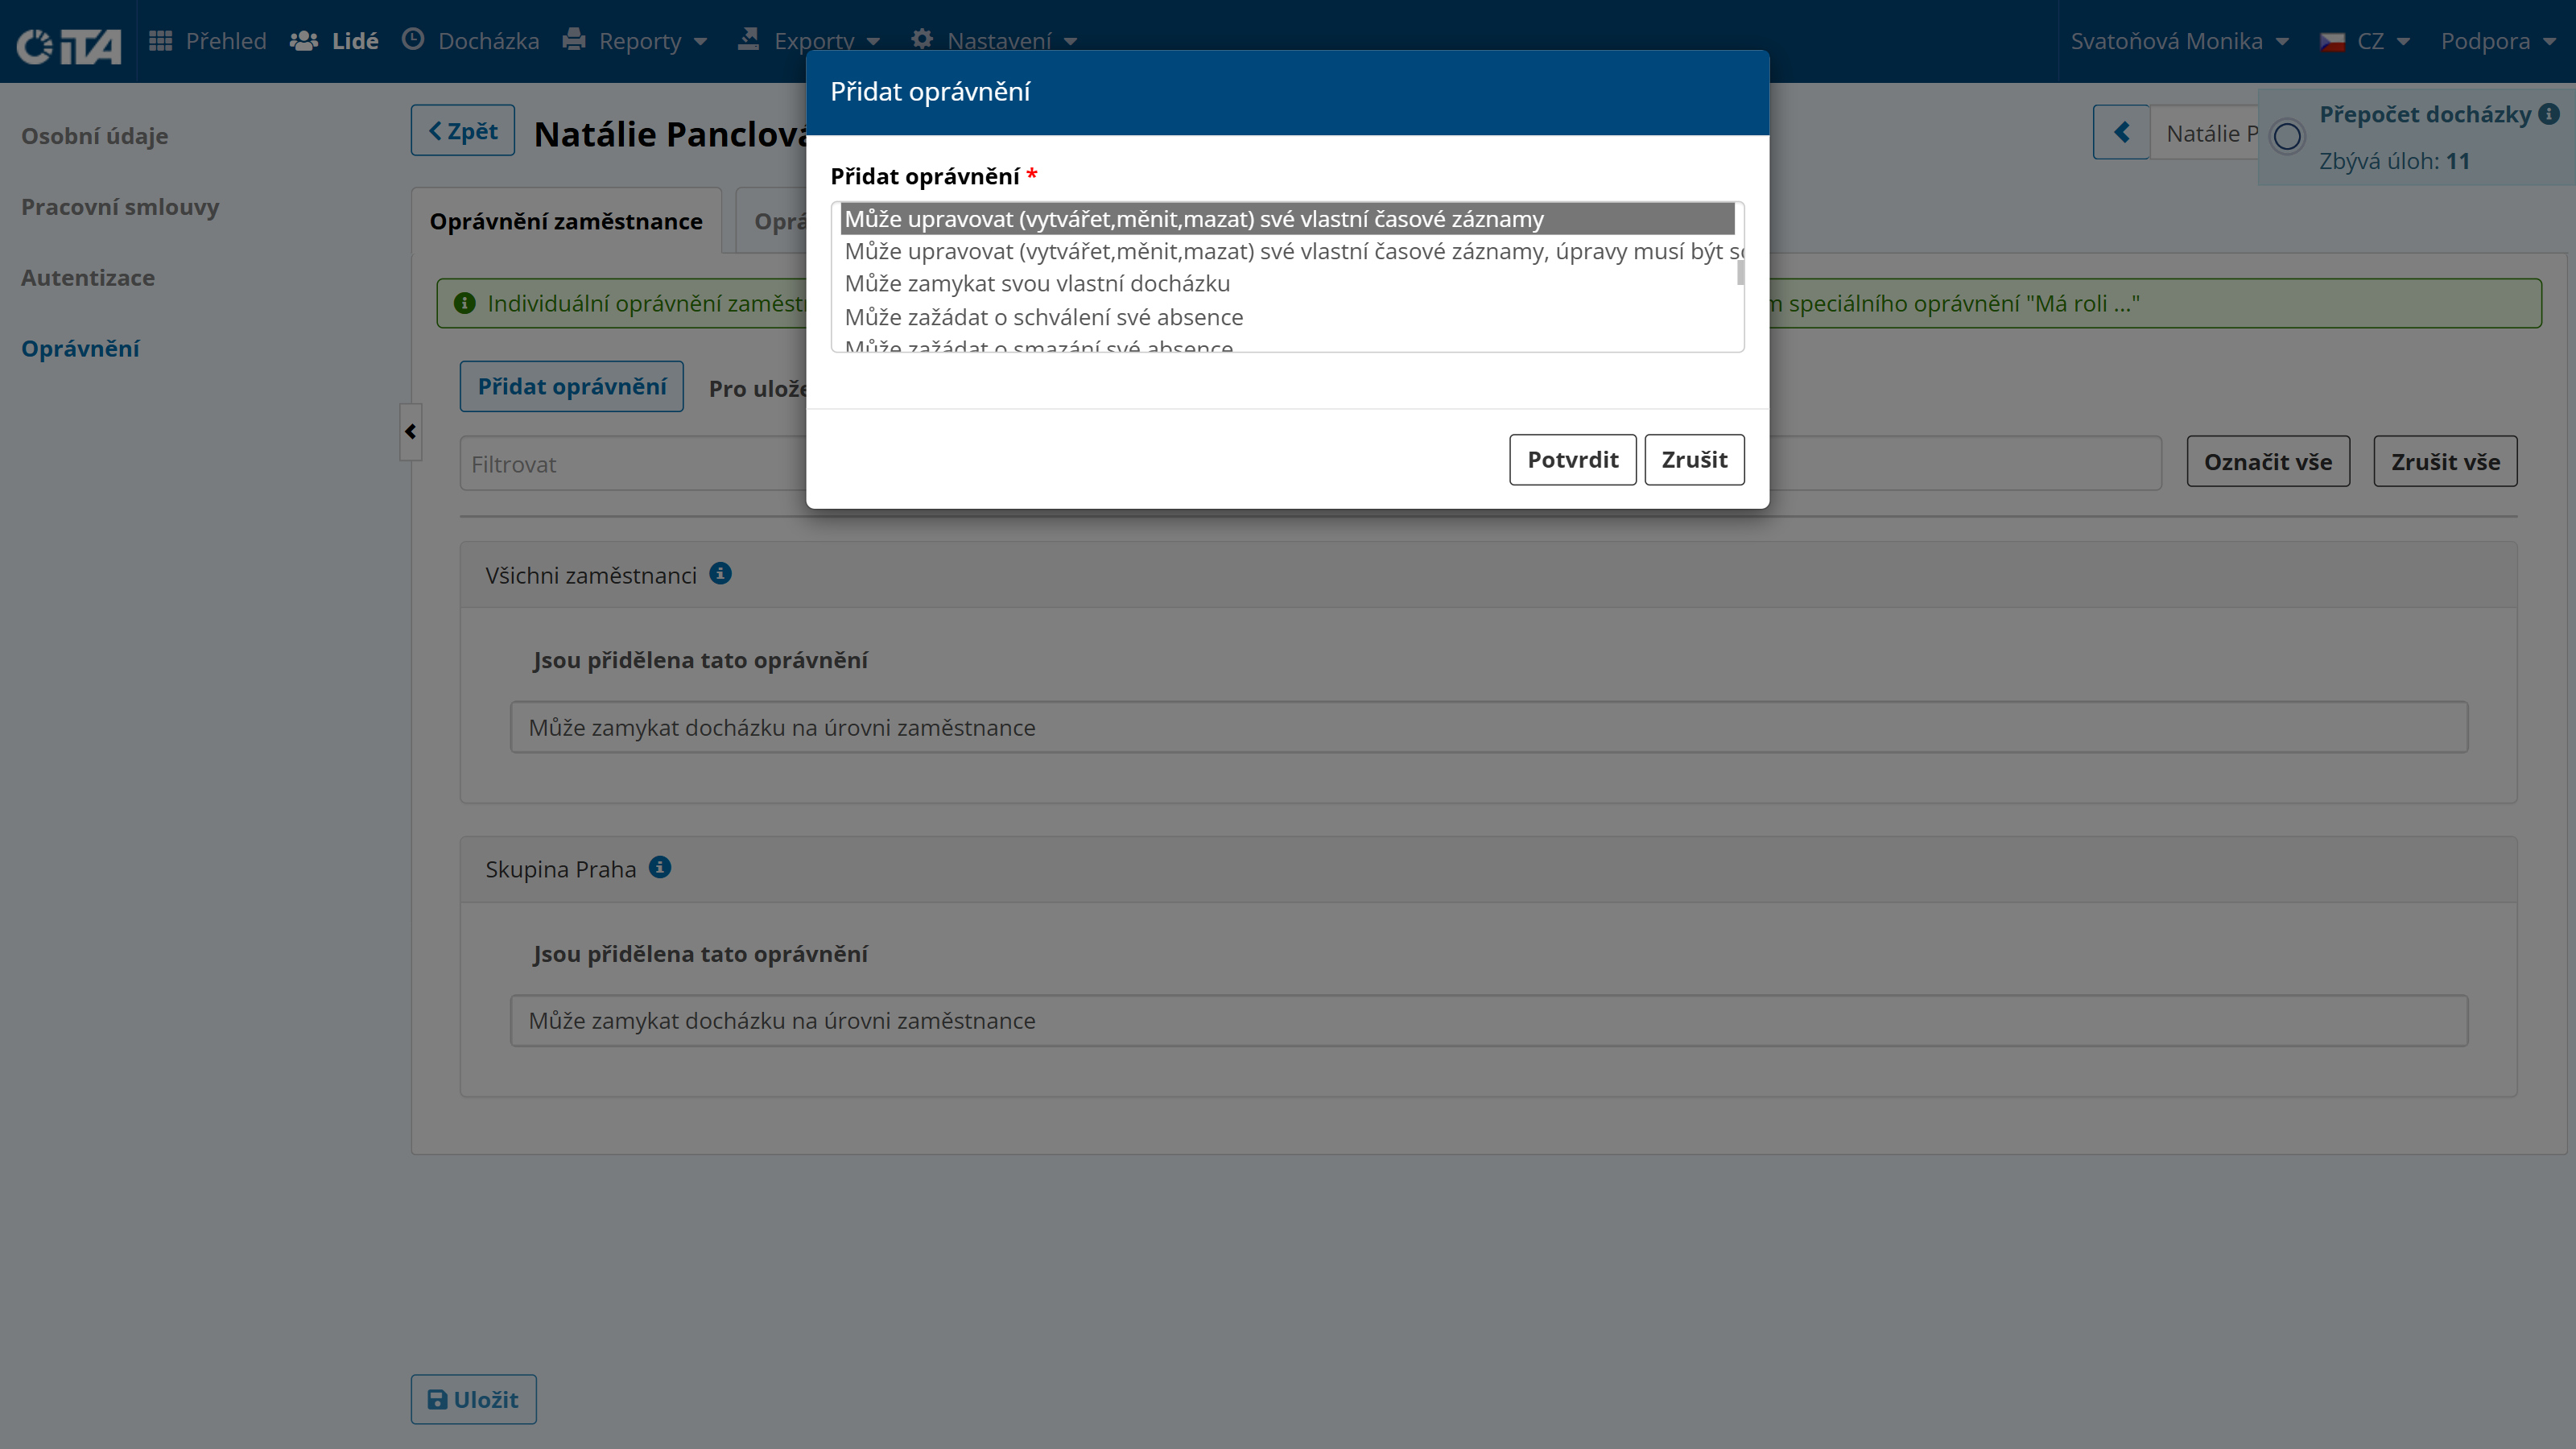
If needed, the employee can create their own vacation and planned absence requests, and edit/add clock-in and clock-out times.
Clock-in/Clock-out Record#
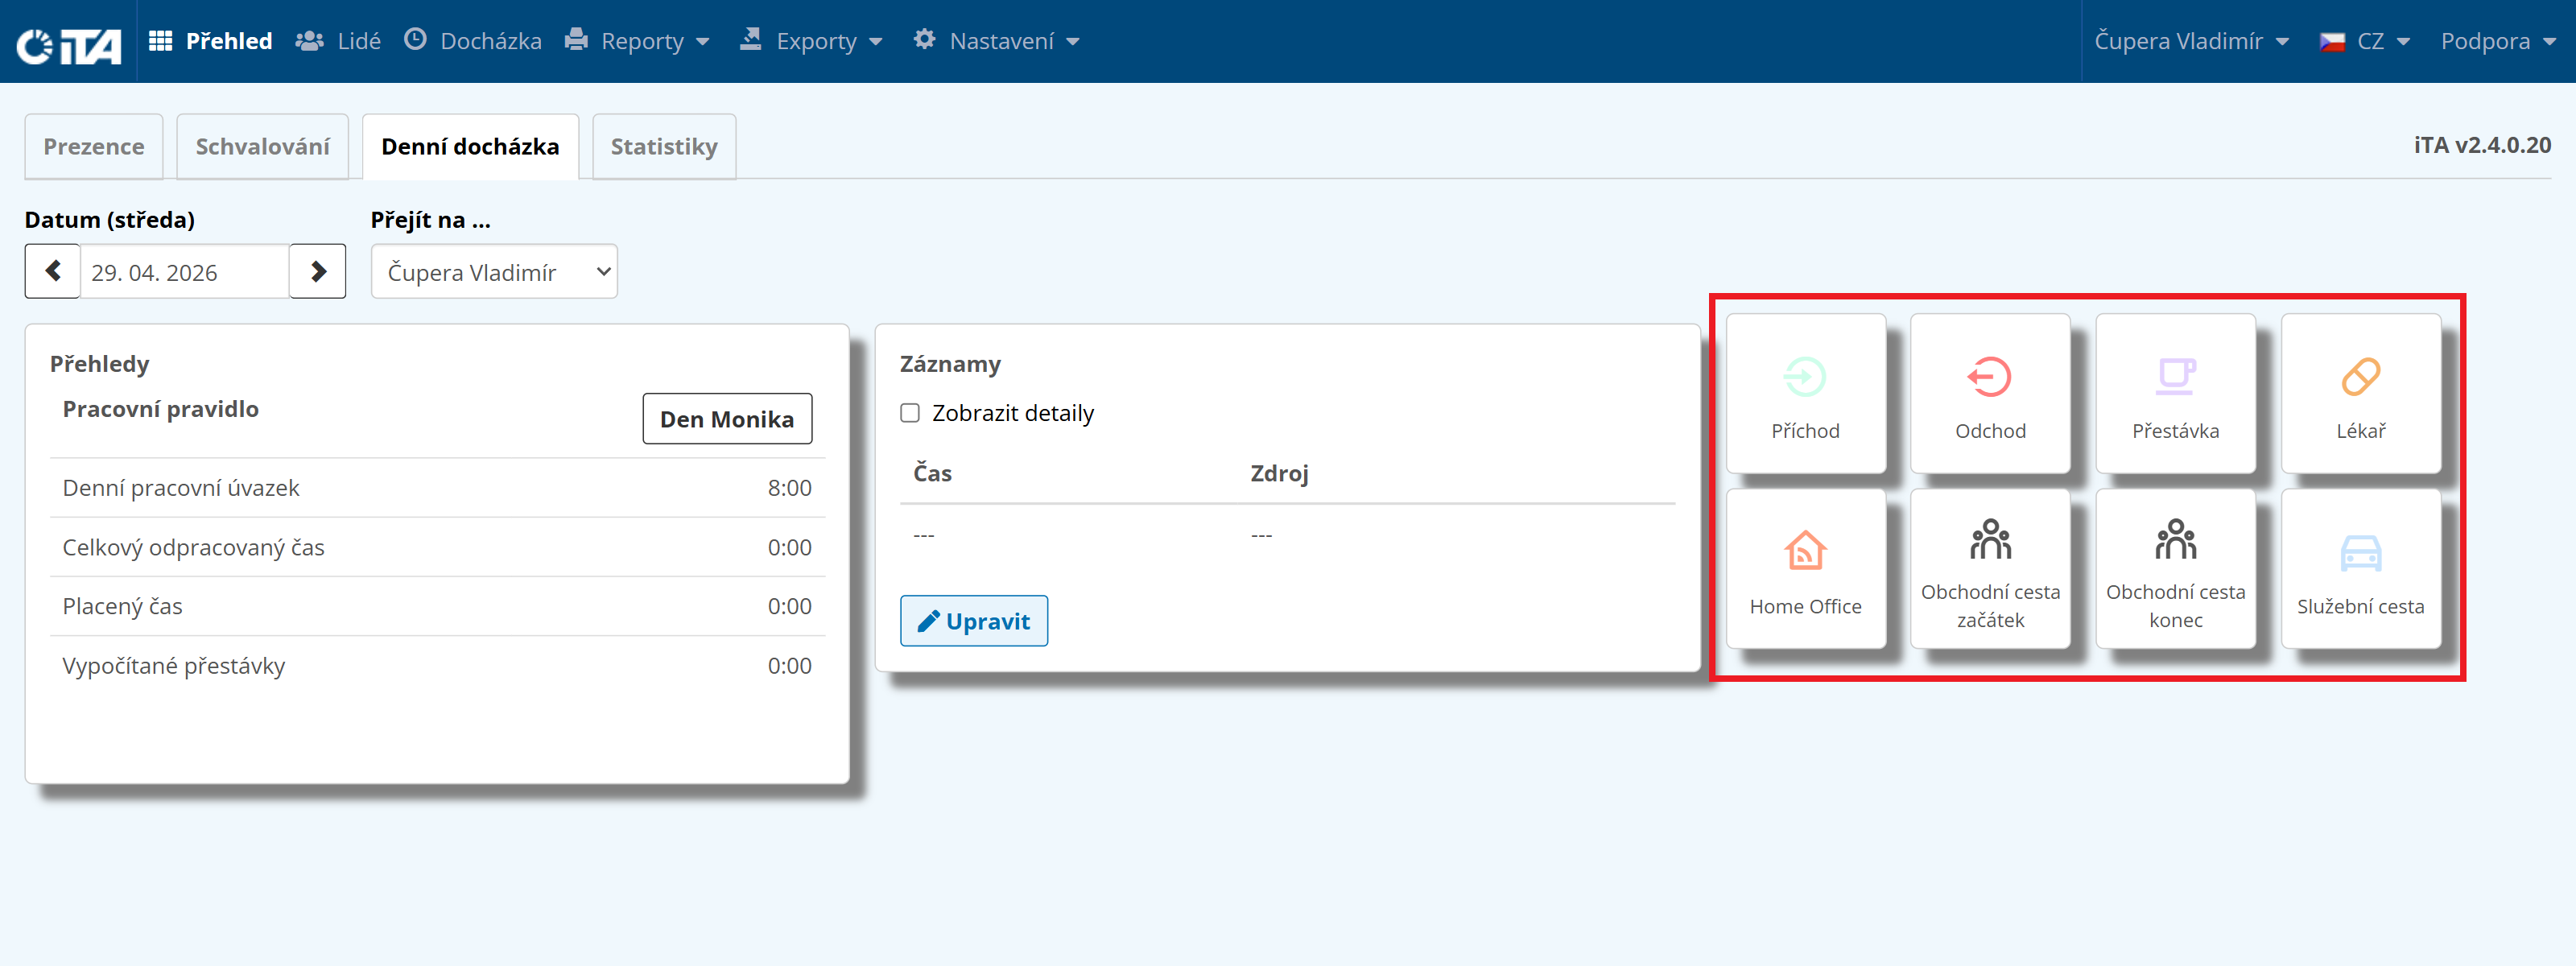
For this option, the employee uses Overview → the Daily Attendance tab, where they click a tile (clock in, clock out, break, doctor’s appointment, etc.).
For both clock-in and clock-out, the “Generic” record can be used. The system then automatically determines whether it is a clock-in or clock-out.
Changing a Clock-in/Clock-out#
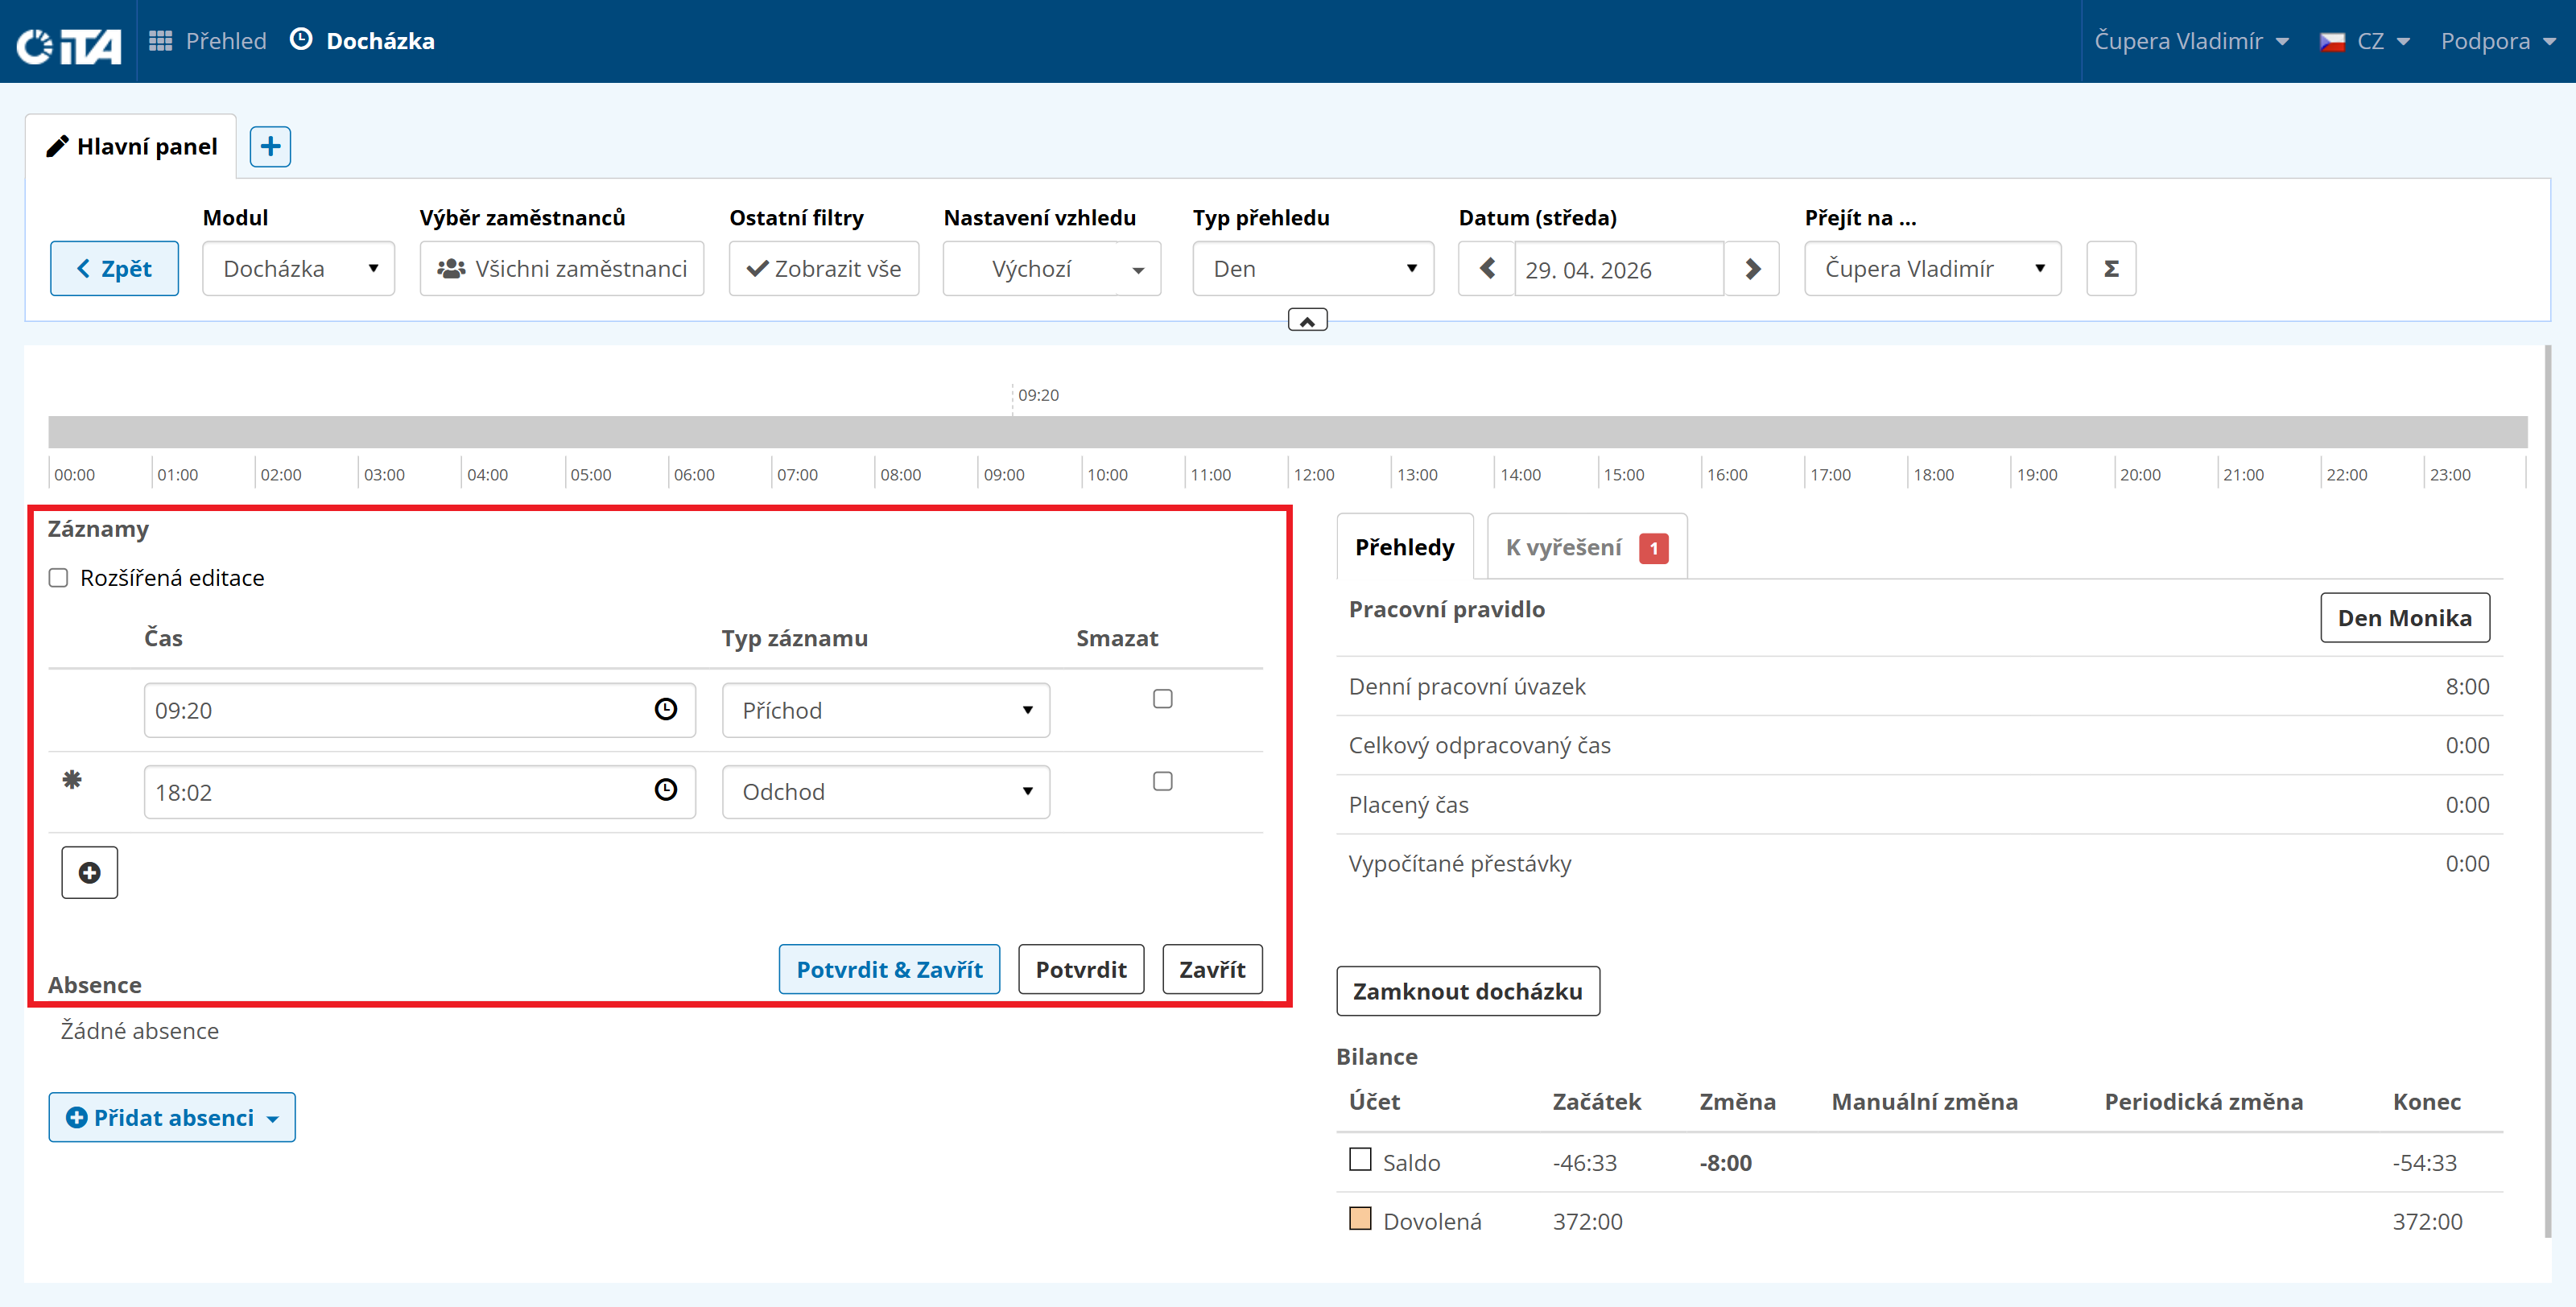
The employee makes the change in the Attendance module, if they have the relevant permission:

Module Attendance | Overview type Day | Date (day) the day on which the clock-in/clock-out should be changed | Go to … the employee the change applies to|
In the Records section, the employee clicks Edit and changes the time and, if needed, the record type in the relevant fields. For both clock-in and clock-out, the “Generic” record can be used. The system then automatically determines whether it is a clock-in or clock-out. Finally, save by clicking Confirm & Close.
For full-day or multi-day absences, use the “Monthly or Yearly Overview”, where the employee can easily select the days they need. Right-clicking the selected days opens a menu. From this menu, the employee can choose one of the allowed absences in the “Insert Absence…” field, or add the required records in the “Add Records” field (the same as in the “Daily Overview”; however, here you can edit multiple arrivals and departures at the same time).
1
Tip:
To select multiple days, hold the Ctrl key while selecting, or simply hold down the left mouse button and drag across the desired selection.
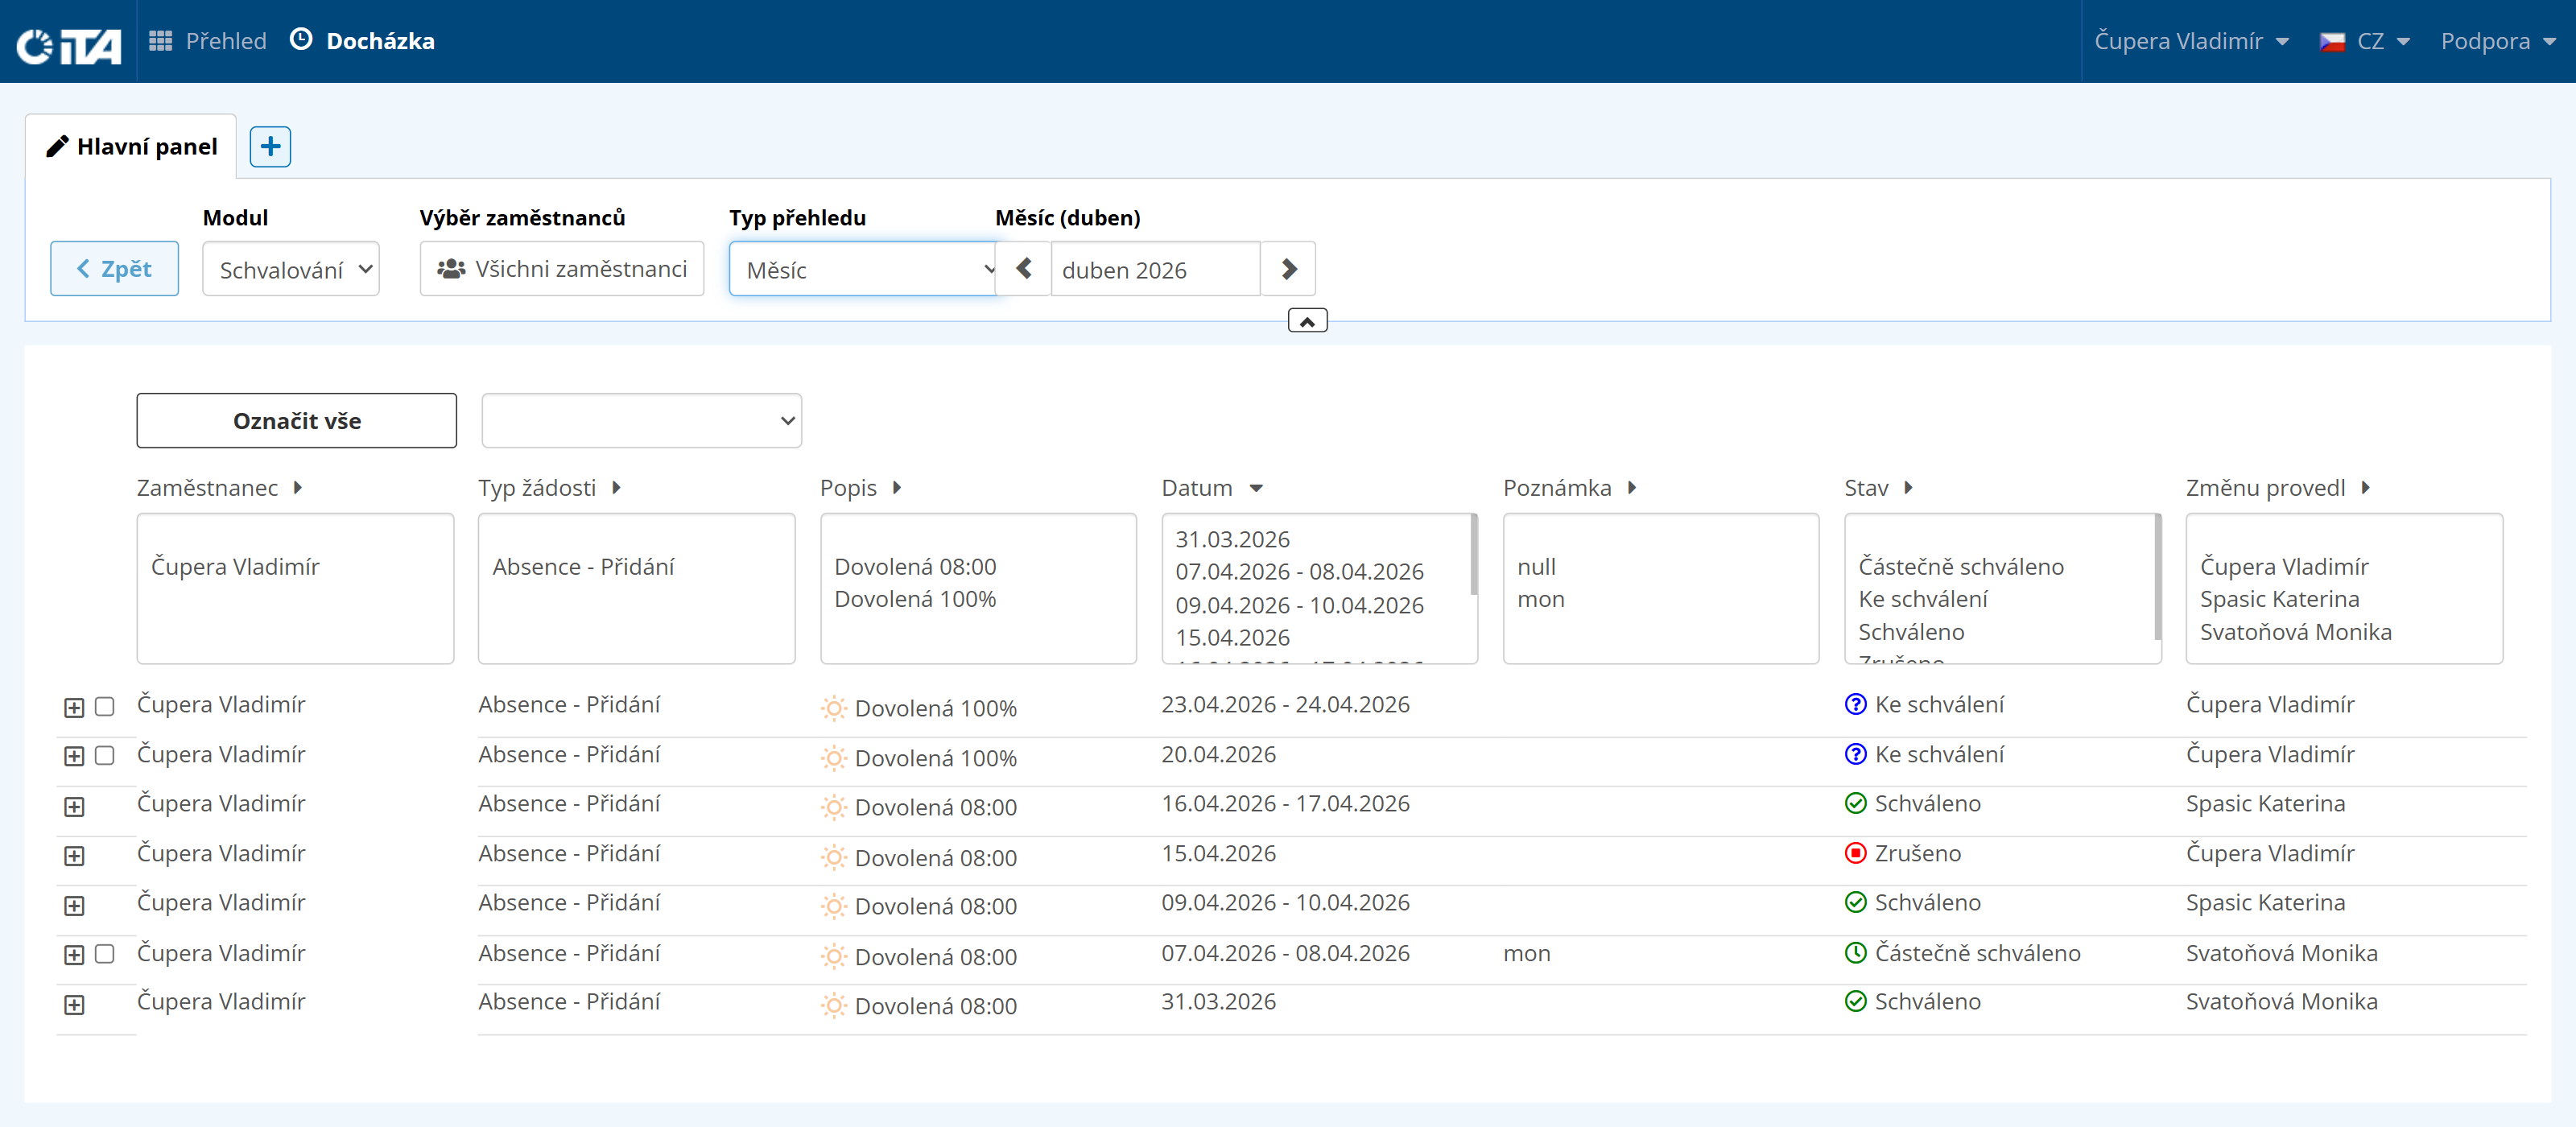
When an employee creates a record that requires approval, the request is shown to their supervisor or supervisors (in the case of multi-level approval) in the Approving module, and also in the Approving section. The record can then be approved, partially approved, or rejected.
In this module, the employee sees only their own requests (the same as in the Overview section, Approving tab):
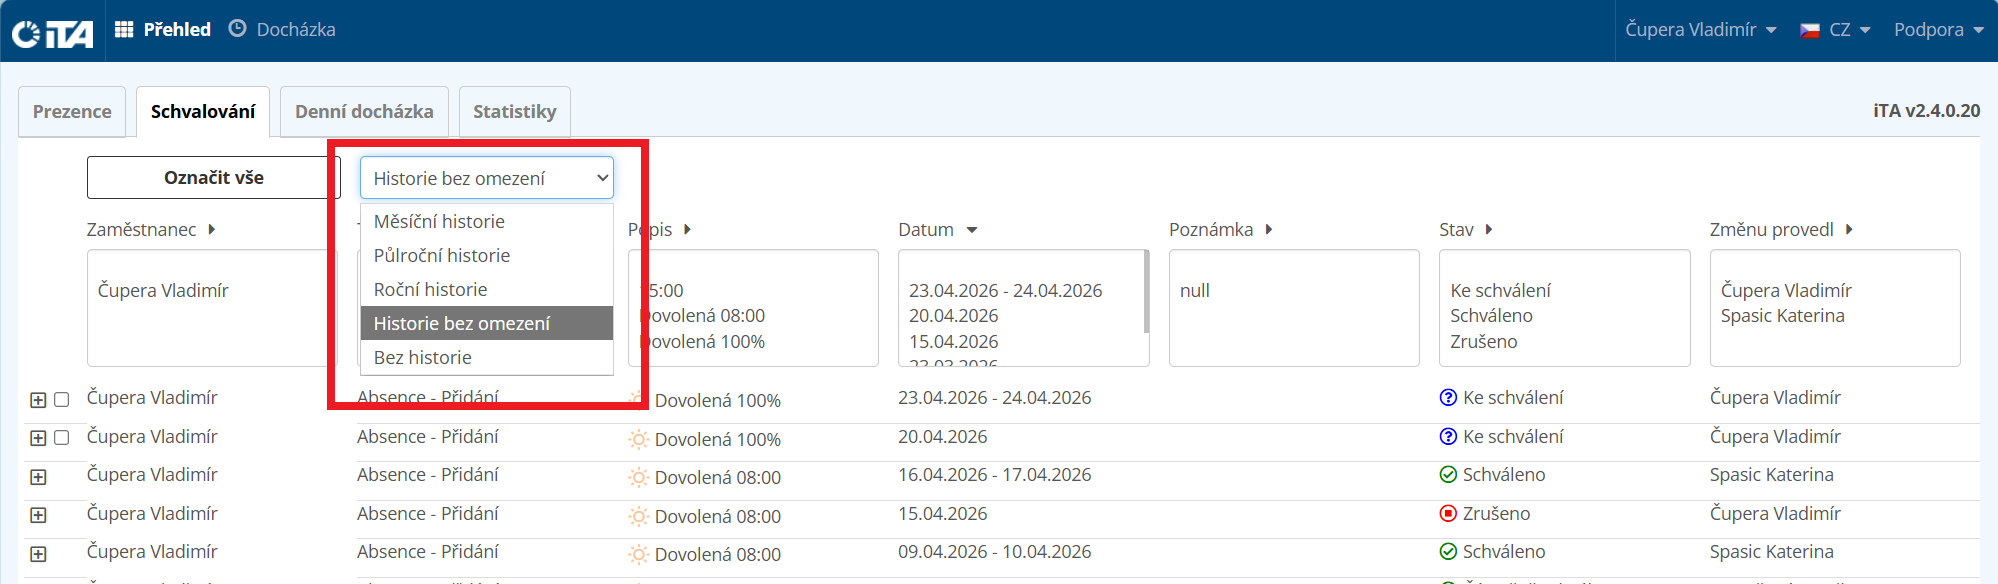
Approval History#
You can configure how far back in the history you want to see approval records: