Notifications#
→
In this module, you can configure automatic monitoring of employee requests, or set up automatic sending of employee attendance. This module is closely linked to the “Approving” module.
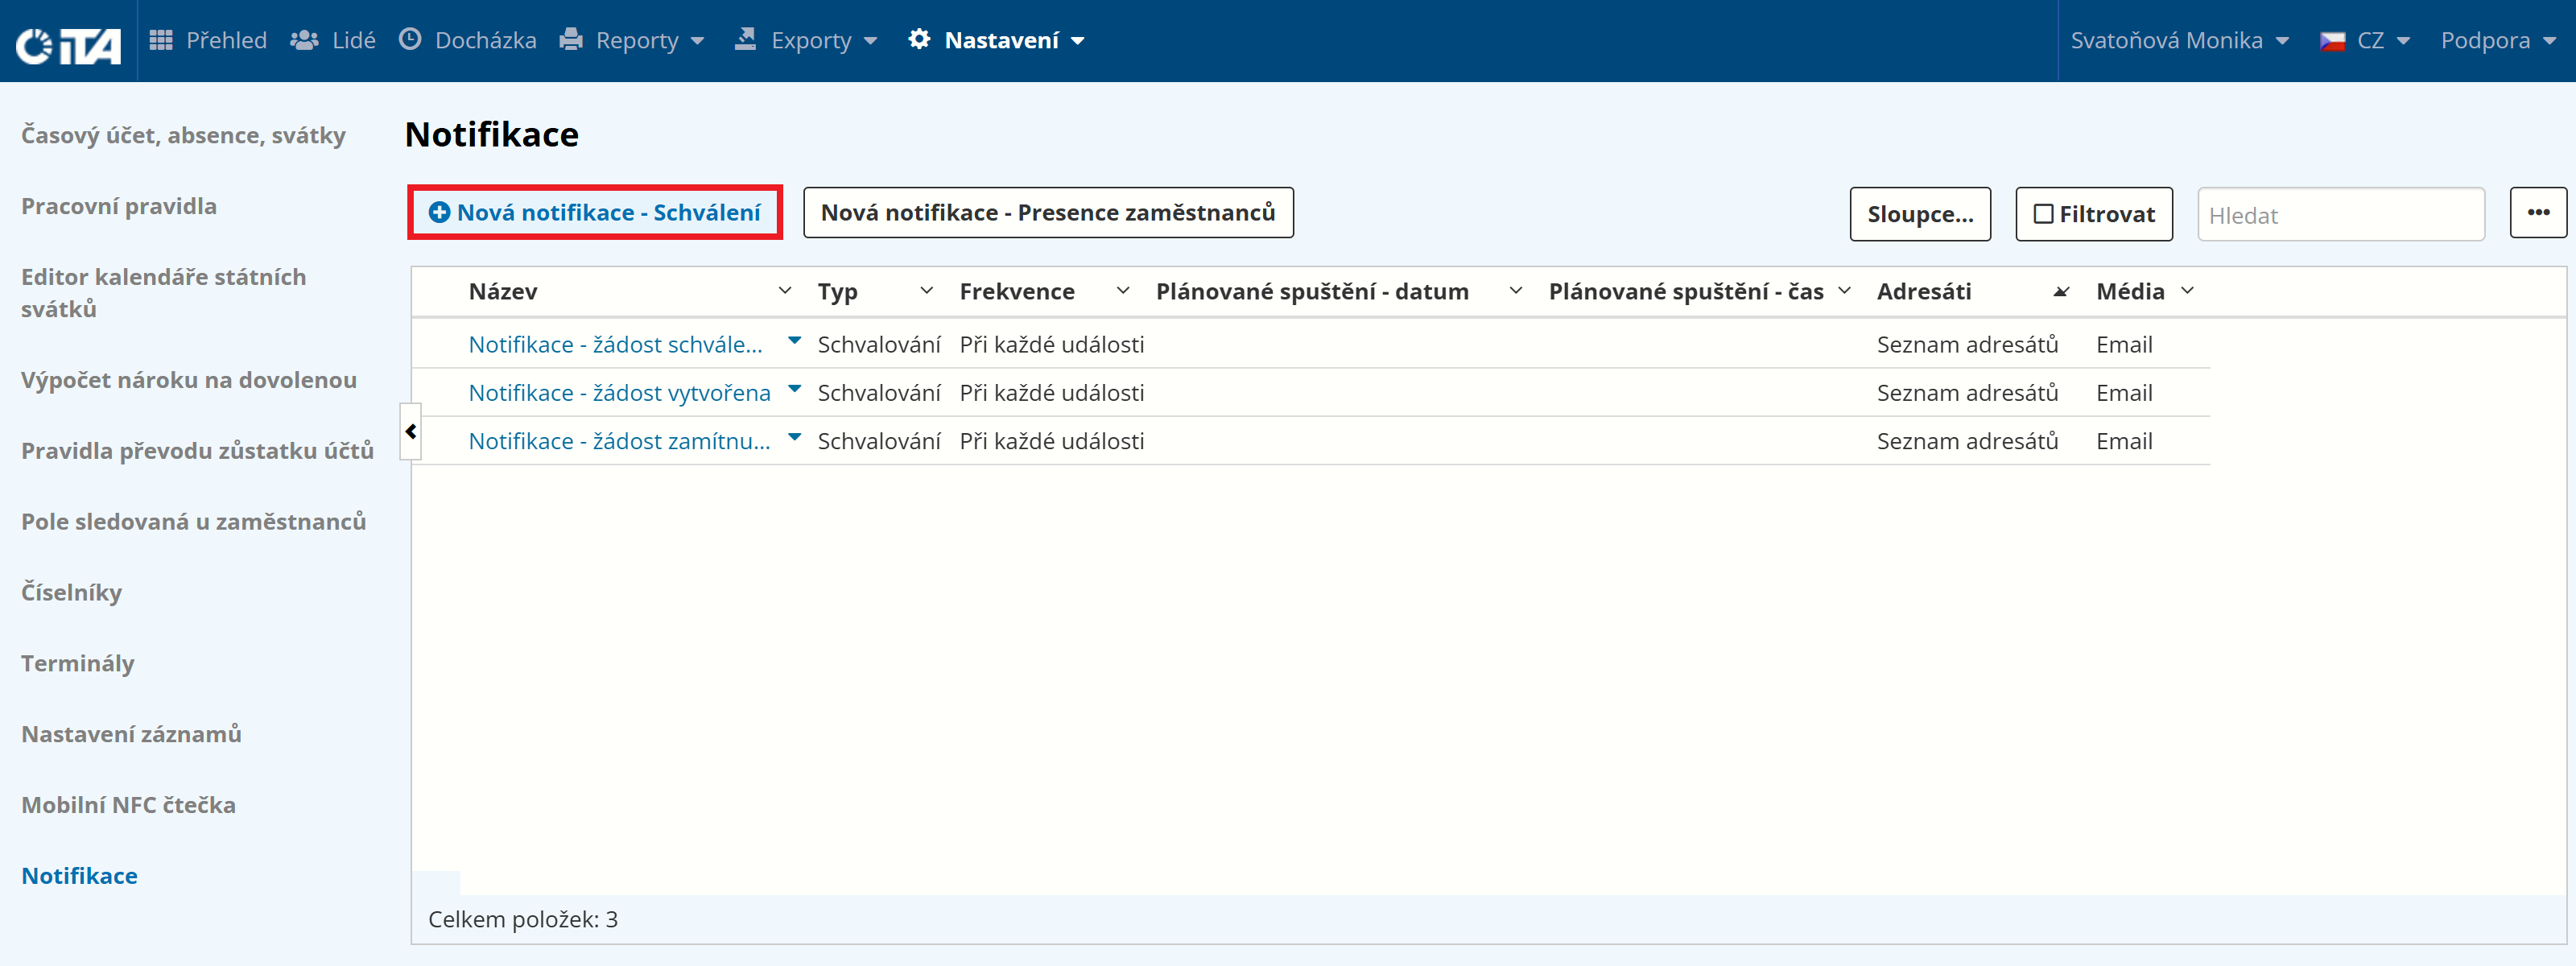
Creating a New Notification — Approval#
This filter applies only to approvals and rejections.
Click New Notification — Approval:
Fill in the parameters:
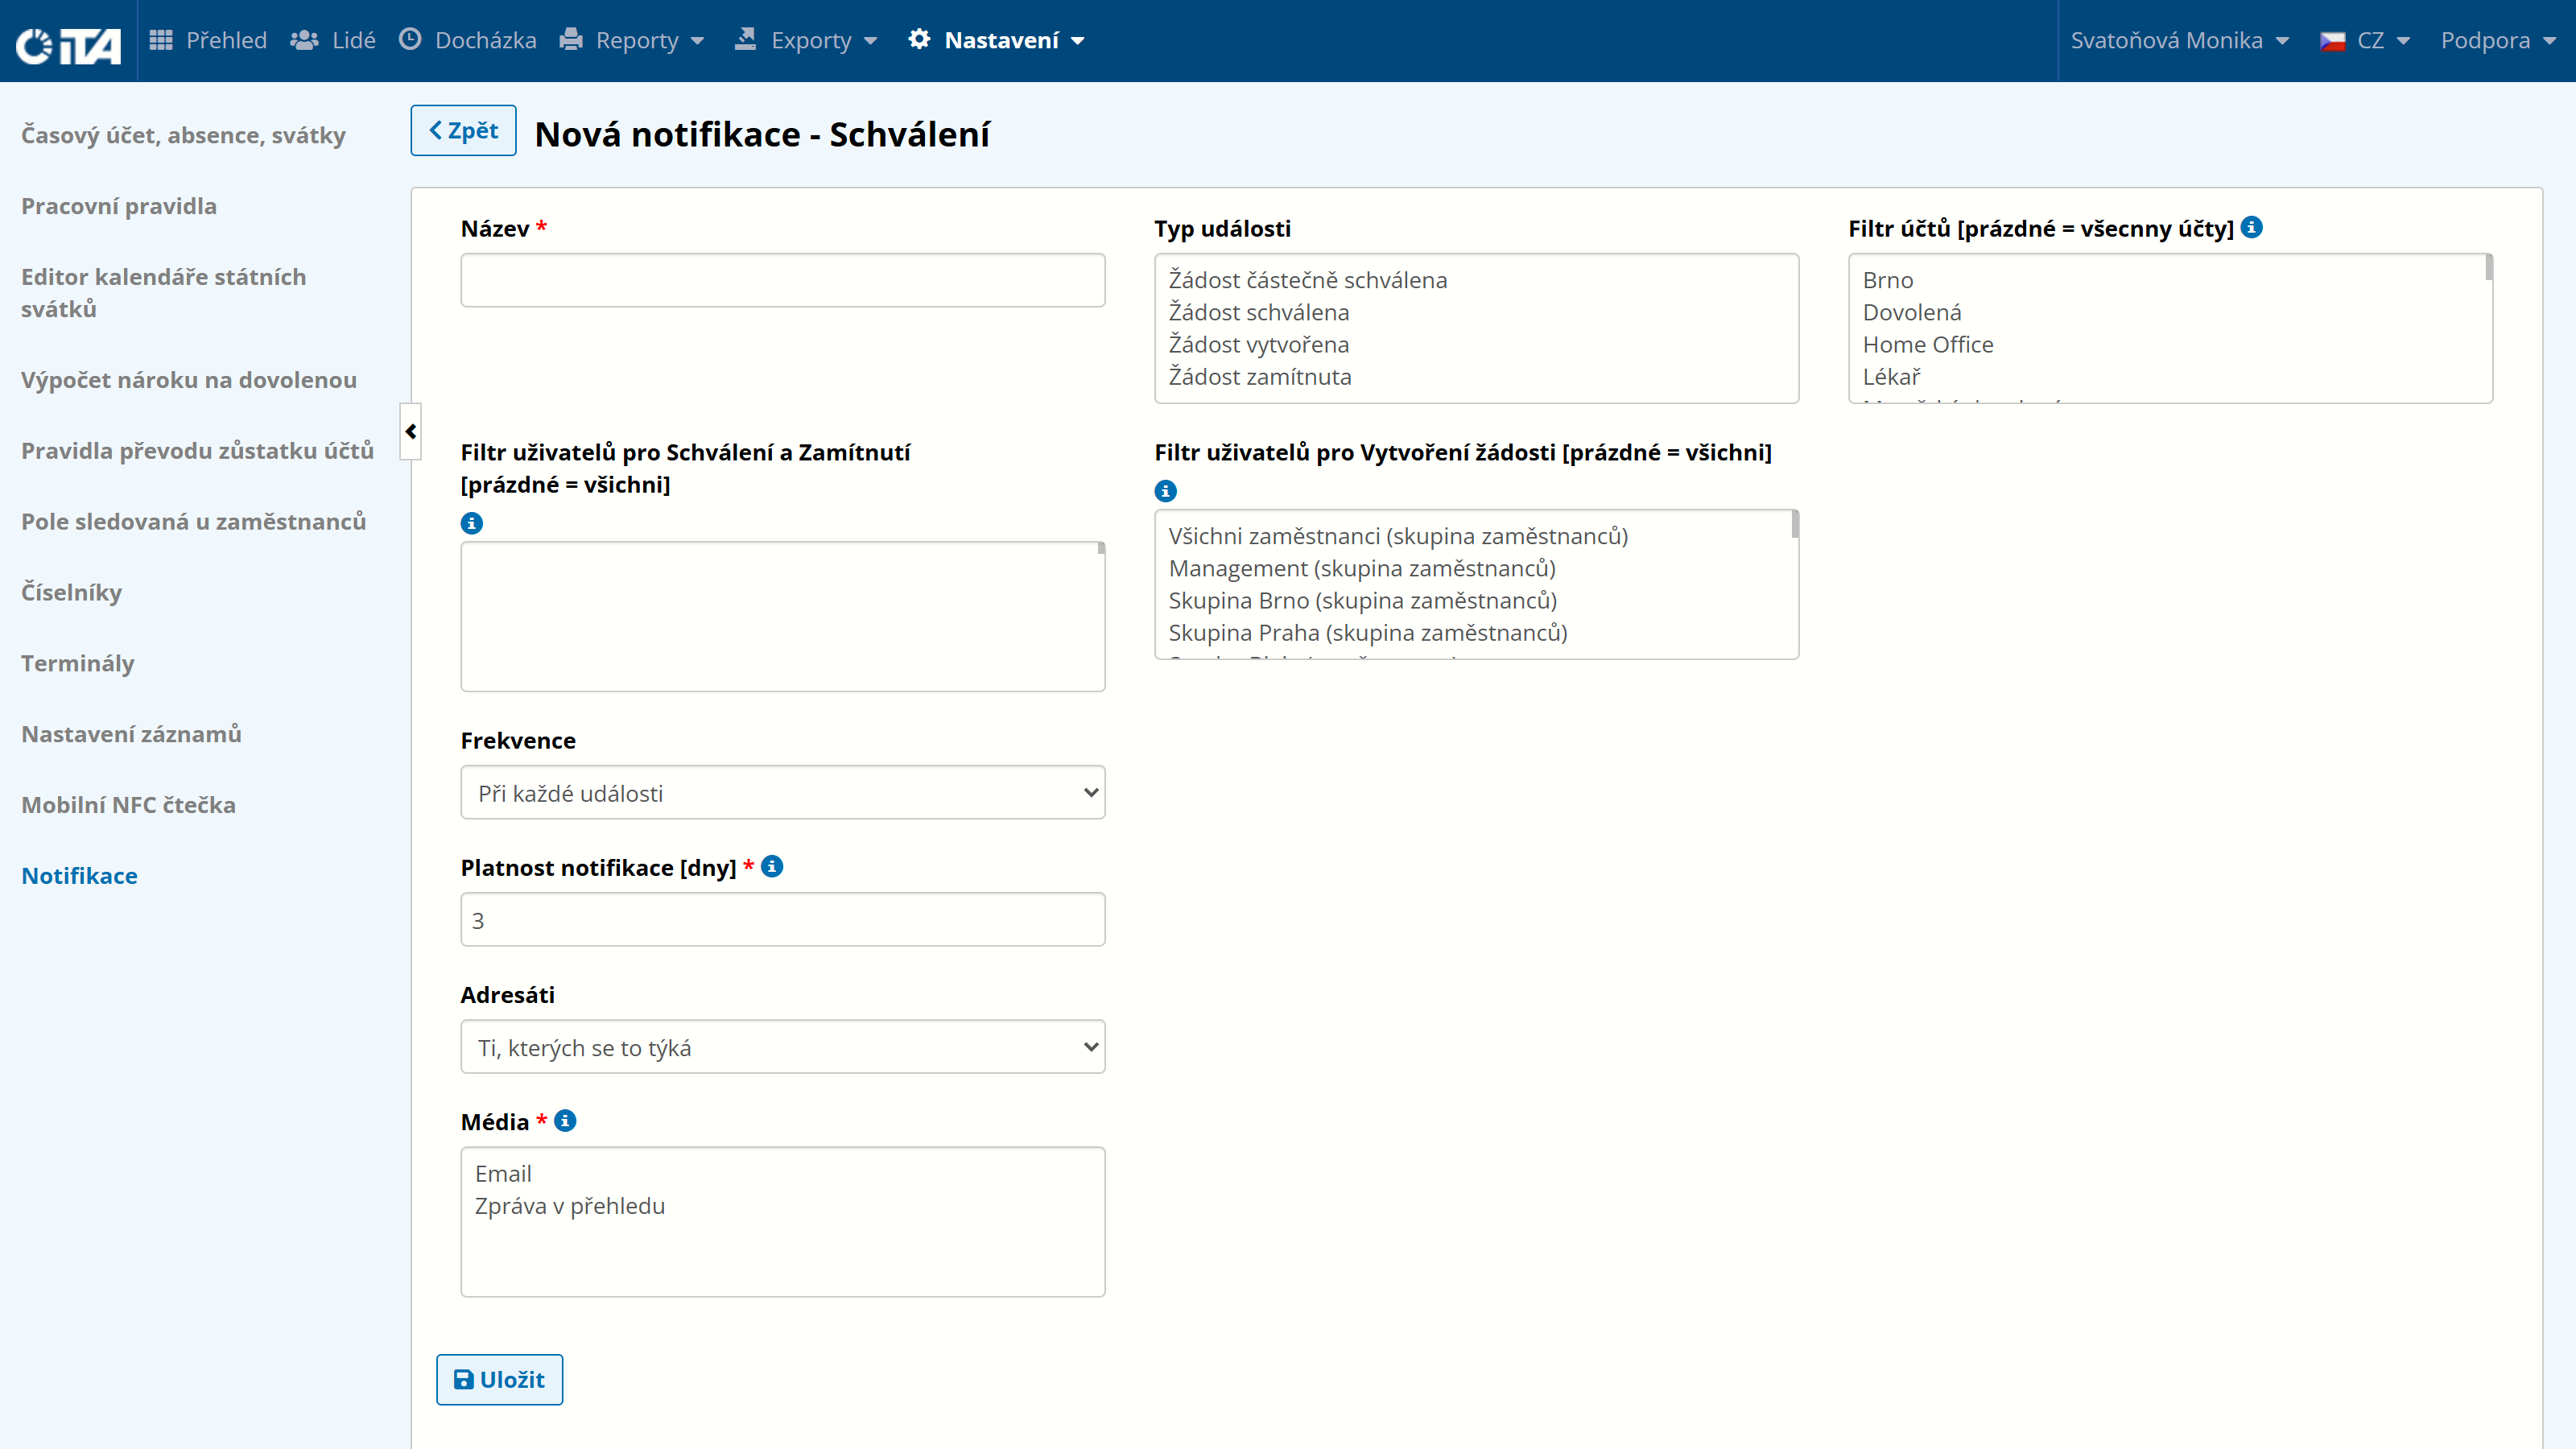
- Name *:
The name under which notifications will be displayed.
- Event type:
Select the type of event for which you want to be notified.
- Account filter:
[empty = all accounts]
Choose for which requests the notification will be shown.
- User filter for Approval and Rejection:
[empty = all accounts]
The person, people, or group for whom the notification will appear. This person must have a registered account in the iTA attendance system. If the field is left empty, all users are monitored.
- User filter for Request Creation:
[empty = all accounts]
The person, people, or group that will be monitored for approval. If the field is left empty, all users are monitored.
- Frequency:
Available options:
On every event
Every day
Every week
Every month
- Hour *:
Only with frequency Every day, Every week, or Every month.
Select the hour at which the notification arrives.
- Days of week only:
Only with frequency Every day.
Select the day(s) on which the notification arrives.
- Day of the week *:
Only with frequency Every week.
Select the day of the week on which the notification arrives.
- Day of the month *:
Only with frequency Every month.
Select the day of the month on which the notification arrives.
- Notification validity [days]:
This setting applies only when reports are sent to the dashboard. It defines how many days the notification remains visible on the dashboard.
- Recipients:
Two options are available:
Those concerned — Approver and requestor.
Recipient list — Select any users to whom the notification is shown.
- Delivery channels *:
Choose where the notifications will be sent.
Dashboard — The notification appears on the dashboard.
Email — The system sends an automatic email to the address of a user with an iTA account.
Click Save.
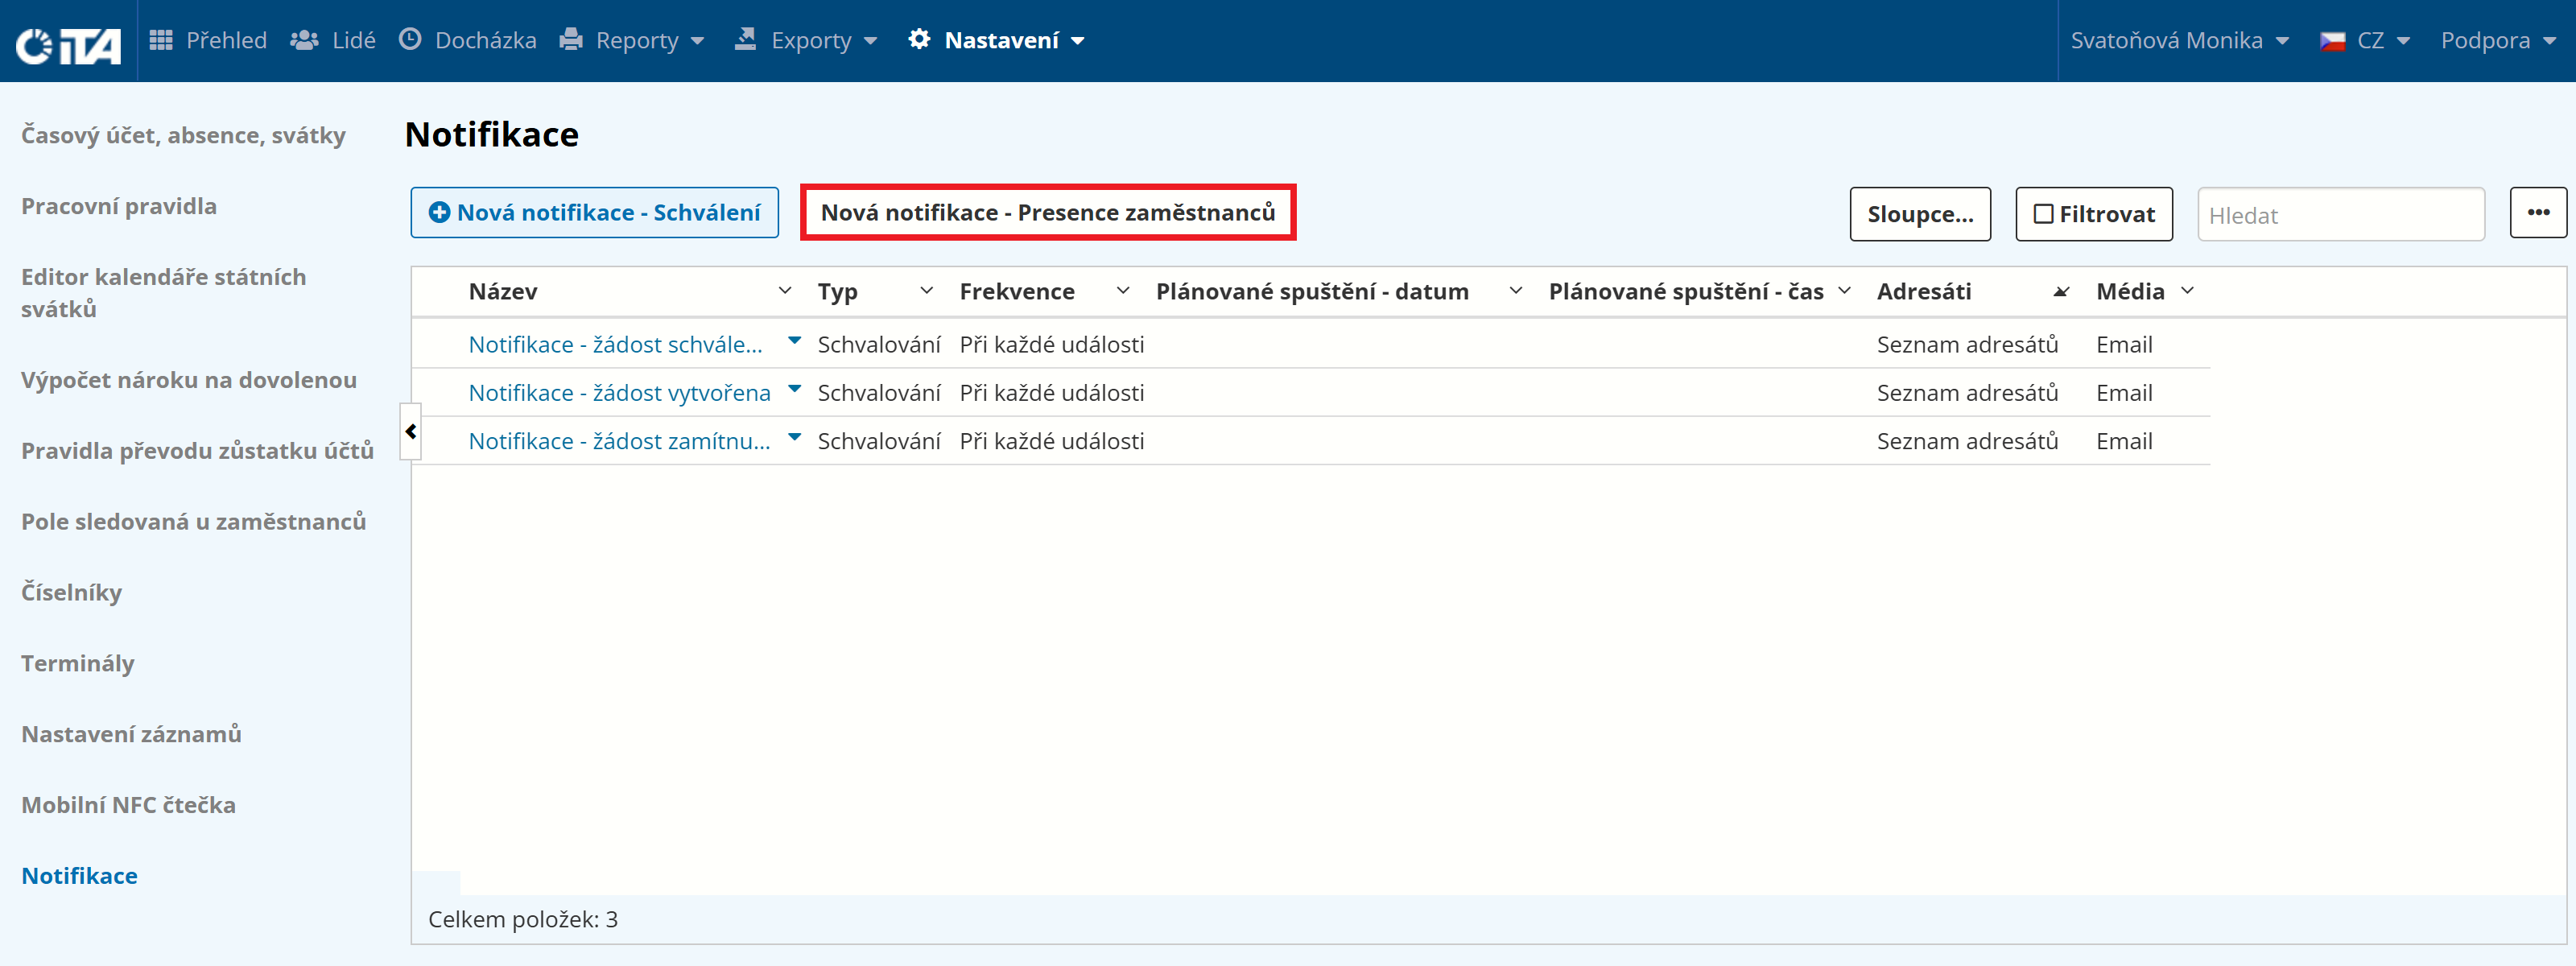
Creating a New Notification — Employee Attendance#
Click New Notification — Employee Attendance:
Fill in the parameters:
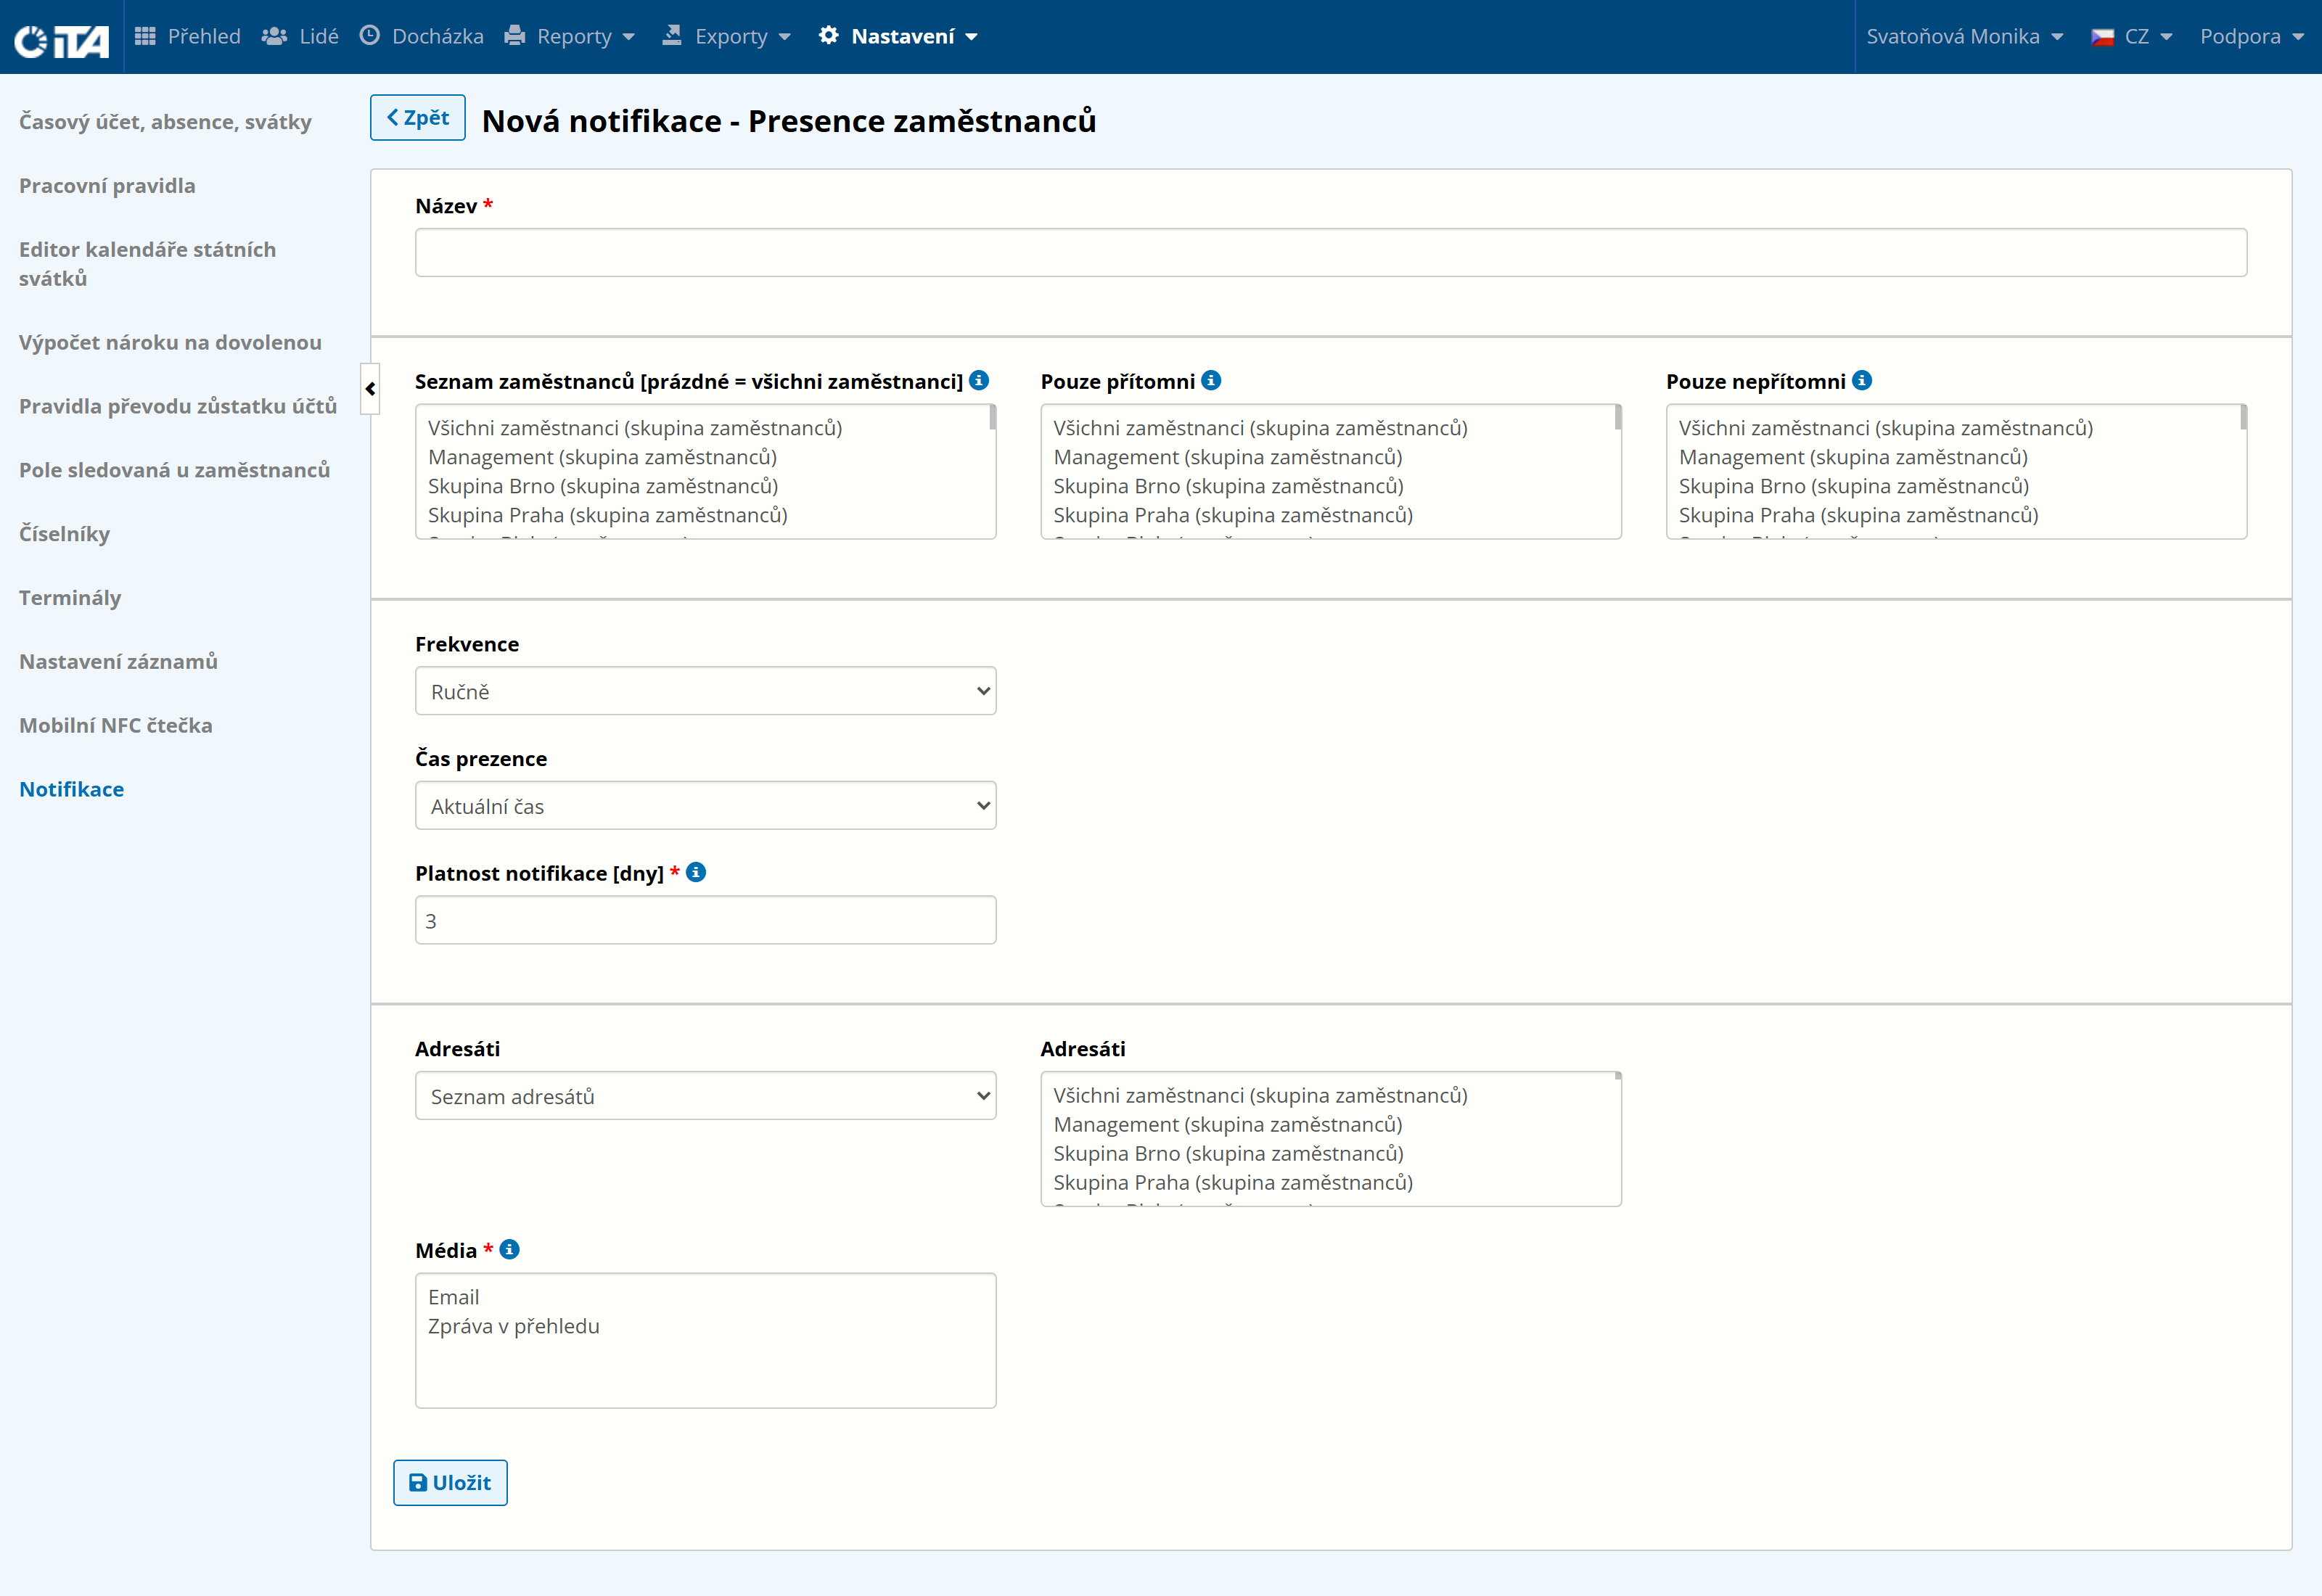
- Name *:
The name under which notifications will be displayed.
- Employee list:
[empty = all employees]
The list of employees whose attendance is reported.
- Present only:
Employees on this list are reported only if they are present at the workplace at the attendance time.
- Absent only:
Employees on this list are reported only if they are absent from the workplace at the attendance time.
- Frequency:
Available options:
Manual
Every day
Every week
Every month
- Hour *:
Only with frequency Every day, Every week, or Every month.
Select the hour at which the notification arrives.
- Days of week only:
Only with frequency Every day.
Select the day(s) on which the notification arrives.
- Day of the week *:
Only with frequency Every week.
Select the day of the week on which the notification arrives.
- Day of the month *:
Only with frequency Every month.
Select the day of the month on which the notification arrives.
- Attendance time:
Set the current or specified time at which attendance is sent:
Current time — example: You set the “Hour” field to send attendance at 13:00. Thanks to the “Current time” option, the system honors the configured 13:00 time and sends the notification at that time.
Specified time — example: You set the “Hour” field to 13:00 and the “Attendance time” field to 12:00. In this case, the notification arrives at 13:00 and contains attendance records as of 12:00.
- Notification validity [days]:
This setting applies only when reports are sent to the dashboard. It defines how many days the notification remains visible on the dashboard.
- Recipients:
Two options are available:
Recipient list — Select any users to whom this notification is shown.
Recipient list (optional emails)
- Delivery channels *:
Choose where the notifications will be sent.
Dashboard — The notification appears on the dashboard.
Email — The system sends an automatic email to the address of a user with an iTA account.
Click Save.